Building Your Library – Cabinet Design
 If you have been following my blog cabinet design series, you should have your cabinet boxes completed and stored within your library, so now, just as in the shop, we need to make some doors, drawers and other accessories to fit the boxes with. We will walk through the doors with the understanding that the other components work very much the same way.
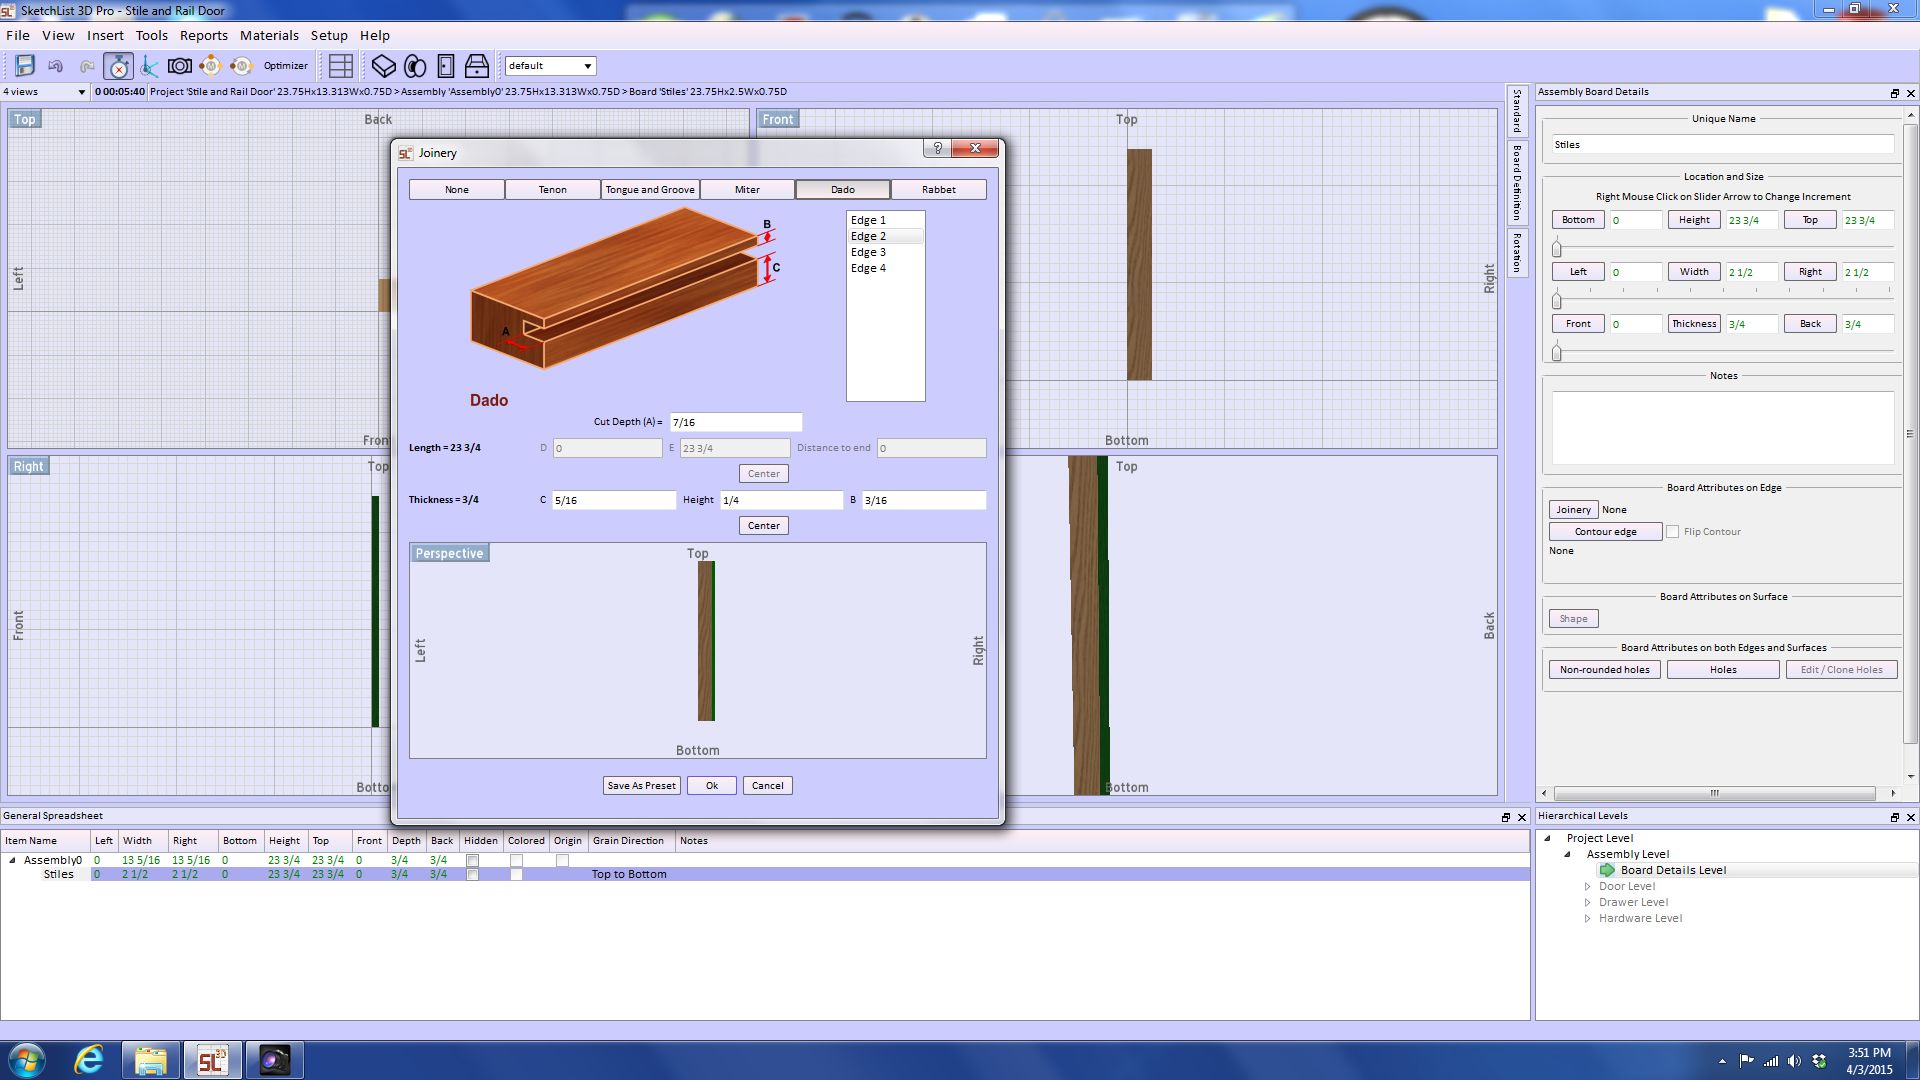
I want to “build” my door in the software using five parts just as I will out in the shop. So the stiles get laid out using the board commands just as if starting any new project. SketchList 3D Pro allows you to either add joinery or contour the edges of the stiles and rails, but you can’t do both. The good news is that you can contour the edges needed, and ignore the grooving since the grooves do not change the cut list.
Now the stub tenons on the rails WILL change the cut list for the part, but you can add them easily to the appropriate ends of the rail. Both contouring and joinery are added by selecting the part, clicking on the “Details” button, then clicking on the edge (or edges) to be detailed. Now you can select either “Joinery” or “Contour Edge” and add the desired attributes.
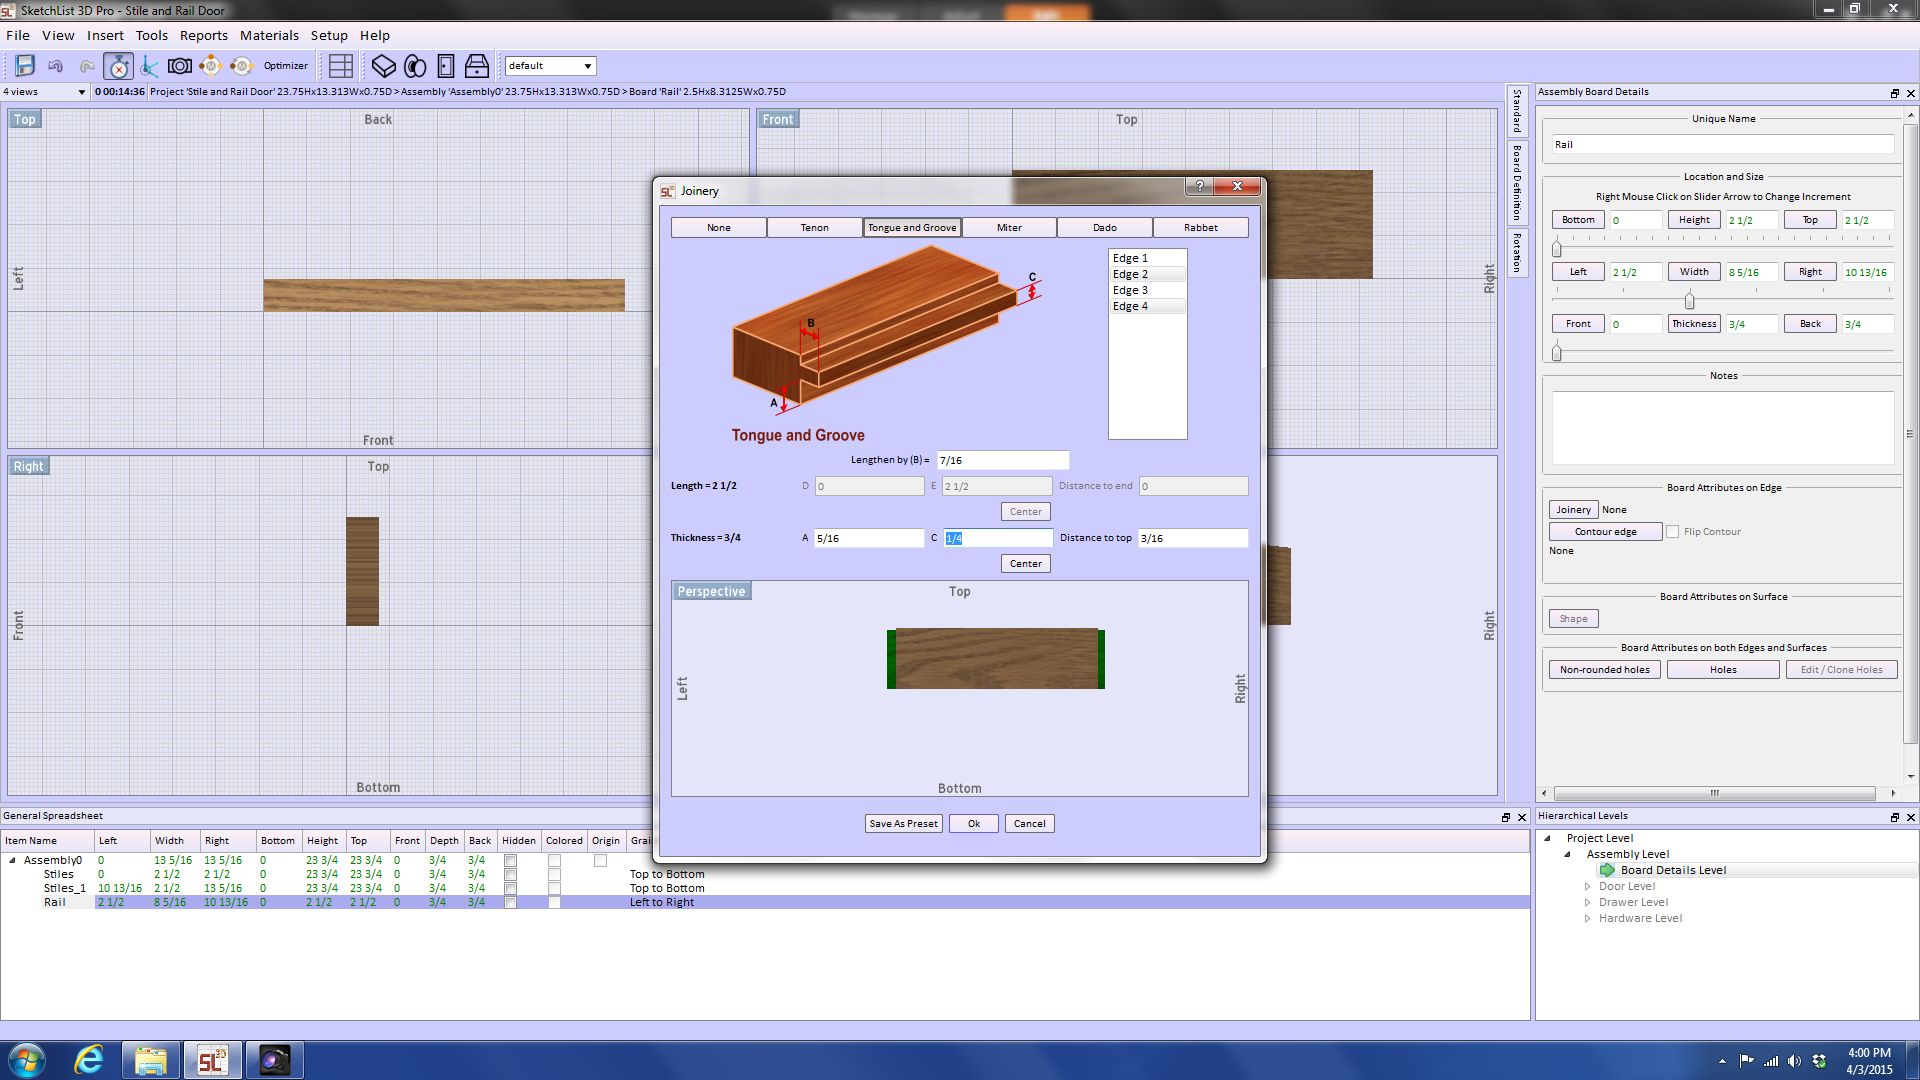
Interestingly, SketchList 3D Pro actually ADDS tenons to the end of your parts. This makes creating the rails much easier. The rail dimensions are set to the visible space between the stiles, and the tenons added to the length of my door making set. No math needed to account for the tenons! In other words, if your rail was to be 12″ long with 7/16″ tenons on each side, you simply create the rail at 12, add the 7/16″ joinery and the cut list will reflect a 12 7/8″ long rail!
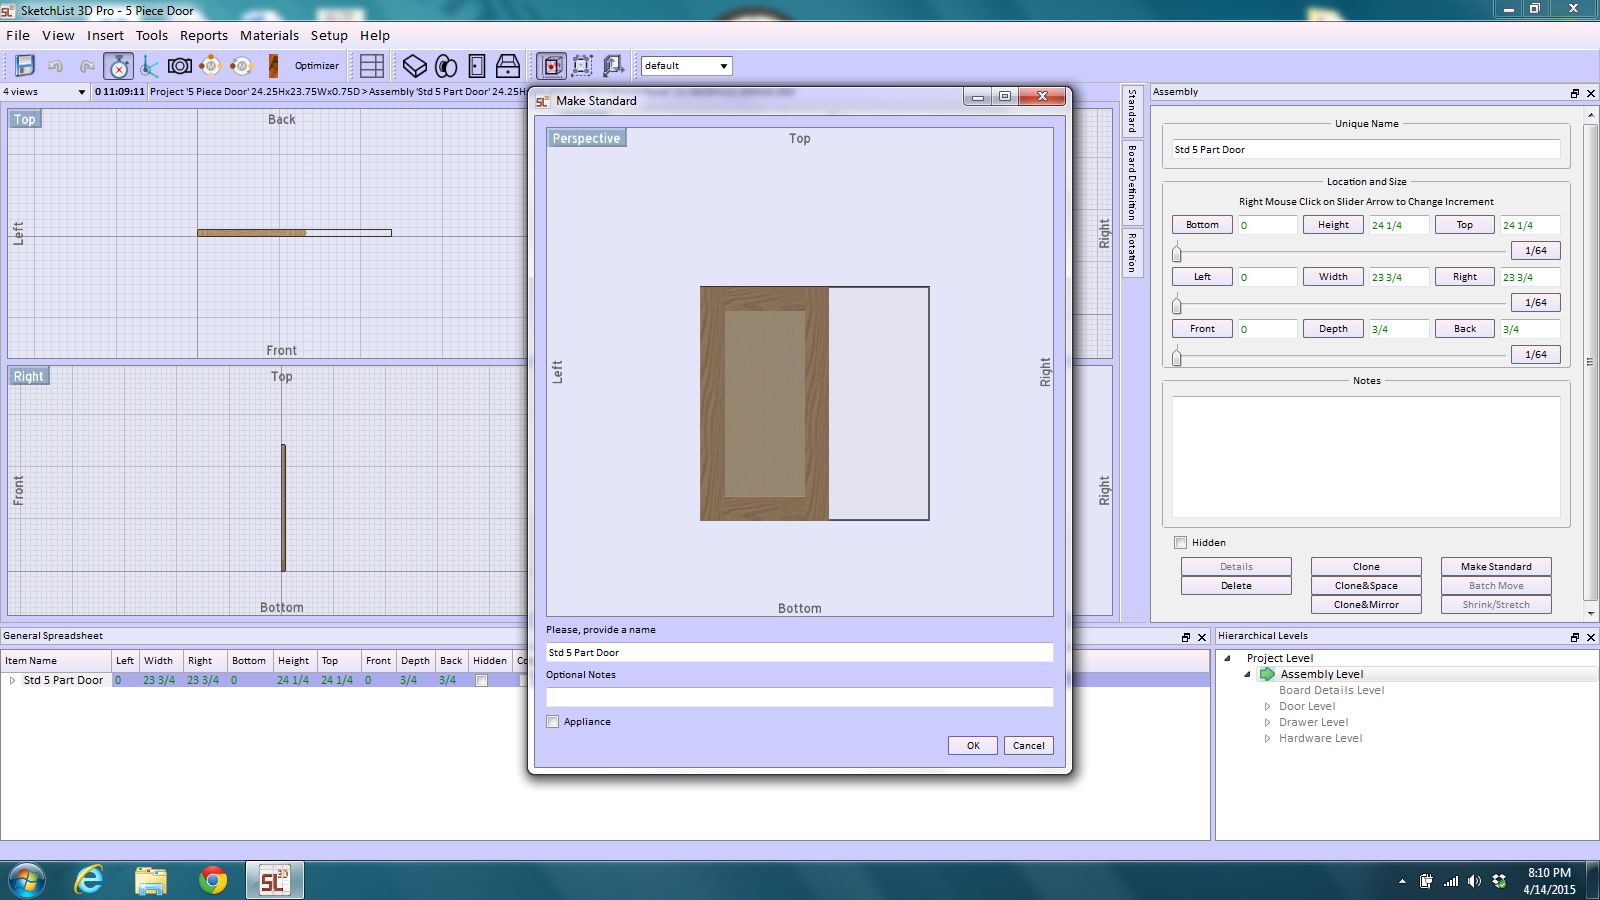
Once the door is complete, it can be saved to your library, to be added and custom edited to each cabinet in your kitchen model! To add it to the library, just select the door at the assembly level and click on “Make Standard” in the right hand dialog box. Name it, apply any notes you wish, and save it. It is now in your library, ready to be added.
This system is certainly different from the many CAD programs I have used in the past, but that is just because I am “re-training”. Really, most CAD programs work pretty much the same and once you know one, the only differences are features. SketchList Pro will be easier for woodworkers to learn since EVERYTHING is designed from boards, just like you are already used to. It is a subtle but very important distinction in my opinion.
With my doors done, I’ll create drawers and pull outs in much the same way (again, the software works like you do in the shop, so a box is a box whether carcass, drawer or pull out) and in the next post, I will begin placing my boxes in the kitchen space we created way back in the beginning of the series.

David Rozewski
My woodworking love started in 6th grade in school shop class. I have a BS in Industrial Technology and an MBA. At my first job, I computerized a production accounting system – the results were positive, and I loved the challenges. I left the corporate world to begin woodworking full time and one of my first decisions was to use CAD for my designs. I found that CAD did not meet all my needs. I wrote a specification of what I wanted and turned it into a prototype. SketchList 3D incorporated in 2007. We completed programming and launched. Today thousands of woodworkers use SketchList 3D.


