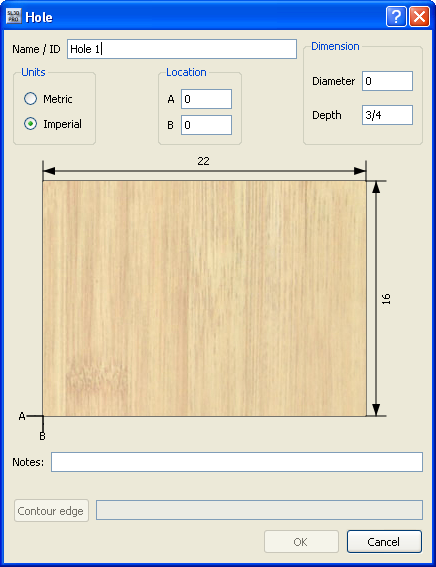
The Hole Dialog
The Hole dialog allows you to specify the locations and dimensions of a hole. You must select a board surface or edge before you can open this dialog.

The Hole dialog has seven areas, as follows:
- The Name/ID box. Enter a unique name for the hole here. This name will be used in the Holes Spreadsheet.
- The Units pane. Choose the units for the hole's measurements.
- The Location pane. Enter the hole's distance from the bottom of the board's surface or edge in A, and the distance from the left of the board's surface or edge in B. Both of these values must be greater than 0.
- The Dimensions pane. Enter a diameter and depth for the hole. Both of these values must be greater than 0.
- The Display pane. Initially this pane displays a plain board. As you enter the hole's location and dimensions, the hole appears on the board.
- The Notes box. Enter any information you want to remember about the hole in this box.
- The Contour Edge box.
Related topics
The Holes Spreadsheet

