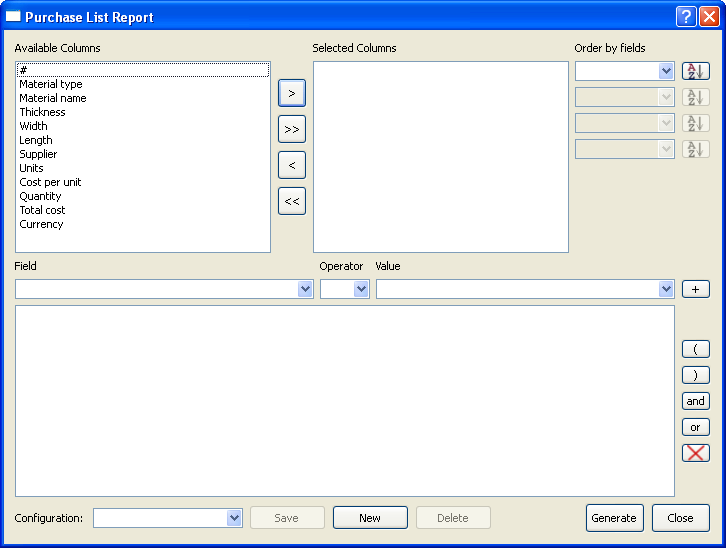
The Purchase List Report Dialog
The Purchase List Report dialog allows you to set up a printable report of the parts you need to buy for a project.

The Purchase List Report dialog is divided into the following four areas:
- The column selection area. Select the columns you want to include in the report, and click the > button. To include all the columns, click >>.
- The column ordering area. Use this area to specify the first four columns in the report. By default, the items in the columns appear in alphabetical order; to put them in reverse alphabetical order instead, click the AZ button next to the column name.
- The row selection criteria area. Use this area to select which parts to include. For example, if you have two assemblies named Left and Right, and you only want to see the parts for the Left assembly that will be cut from a particular material, you can specify that here.
- The Configuration area. Use this area to save the current report configuration, create a new report configuration, or delete a report configuration.
When you click Generate, a preview of the purchase list appears on your screen. Use the commands on the Actions menu to hide page markers, change the font, and set up the page size and orientation. You can then use the commands on the File menu to print the preview, save it as a file on your computer, or exit and set up a new configuration for the report.
Related topics
The Parts List Report Dialog

