This article covers a wide range of ideas about a miter saw bench. As you probably know a miter saw is a power tool that makes accurate crosscuts in a board at a specific angle. It is commonly used for cutting of face frames, skirts, bracing, and molding or trim. The board is held against a fence that provides a precise relationship between it and the of the blade. The default angle of cut is 90 degrees.

Remember way back when? Maybe you’re old enough to have used the “original” miter box with its stocky hand saw. They were made as wooden or plastic three-sided boxes. The front board served to hold the board and has 90 and 45 degree slits cut in it. The slits guided a hand or back saw to cut the board in two.
An advance in cutting miters was made in the 1970s with the introduction of the power miter saw. In addition to the power saw a major improvement was the miter index. The index allows the angle of the blade to be changed relative to the fence holding the board. These days miter saws enable precise one-degree incremental changes to the miter index. They also provide set cuts that allow the miter index to snap to common angles.
Types of miter saws

- Standard miter saw – A powered version designed generally for making cross cuts on a piece of work at a wide range of angles.
- Compound-miter saw or single compound miter saw. In addition to spinning to change the angle of the cut, the saw can be tilted in one direction to cut, essentially, two angles on the board.
- Dual compound-miter saw – Dual or double compound saws allow the head to rotate to both sides.
- Sliding compound-miter saw – Sliding miter saws provide a longer cut by sliding the saw back and forth on a rail.
- Laser guided miter-saws – Some miter saws project a laser line on the wood showing where the cut will be made. I have this type and find it’s great for more precise cutting.
Fences
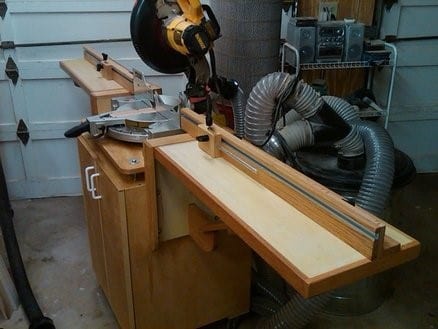
The fence part of the saw against which the board rests. The fence is fixed while the saw can be rotated to create the angle of cut. It serves to hold the board. Often when building a miter saw bench the fence is extended to the right and left to hold longer boards steady.

The photo above is found in an interesting article about secondary fences for your miter saw. Essentially this is a sacrificial fence that allows better control over cutting. Especially true with smaller pieces. It also eliminates tear out while providing more support.
On the other hand, some argue for not having a fence on your bench and using only the saw fence.
“First off, this isn’t a revolutionary concept that I invented but it’s something I thought long and hard about and became confident in my choice through years of using a miter saw with nothing but the stock fence. In the end I think a fence does more harm than good.”
While others offer three advantages of using an extended fence.
- An additional fence makes a more accurate cut. He counters that misaligned fences and bows on boards negate this advantage.
- A fence is needed to place a stop. Spagnuolo and other woodworkers propose a t-track placed on the table surface serves nicely as a stop.
- And my favorite. A fence prevents piling stuff on the bench. Basically, the real answer is to be more organized. Good luck with that.
Read the article to see if it makes sense to you.
https://www.thewoodwhisperer.com/videos/no-fence-miter-station/
And fence stops
A fence stop is a block that allows you to repeatably make the same length cut.
Some people group their pieces and try to make one cut for all the boards at once. This has never really been consistent for me. Parts move around and sometimes cut at an angle different than the others.
Surely a better move is a stop block. Now the block can be attached to a fence or mounted in a t-track on the saw bench table. The idea is that the end of a board butts against block. And you can see this achieves a repeatable cut size.
Commercial fold-up miter saw rigs often have settable stops built into their wings. And there are products that can automatically set stops and slide materials again the stop for rapid and accurate cuts. As always – time is money and their options require you to spend it.
Space considerations.

If you are one of those lucky woodworkers with unlimited shop space skip this section. If you are not read carefully.
Certainly opinions over the size required to a miter saw setup vary a fair amount. The only hard factors are the saw size – and even that varies.
Surely think about this when you design your miter saw bench. What is the miter saw swing arm radius how high is the table? If the
saw arm swings beyond the saw base make sure you allow room fully right and left swing. A third consideration is the amount of hear tilt when cutting compound cuts. Put you saw on a table or work bench and swing it to its extremes. While doing that measure the tallest, deepest, and widest dimensions needed to house that saw. Measure the height from the saw table base to the table or work bench surface.
Pretty much those are non-negotiable sizes in your bench design.
- Depth – consider how you will achieve dust control when selecting a depth. There are people who suggest that a miter saw bench depth can be as little as 14 inches. Also, there are those who insist 30 inches is the right amount. I’ve heard people who mount the benches to the wall to prevent it from tipping over. Smile but don’t forget this is you plan to have lots of drawers or slide out storage. The weight of a few routers extended 24 inches from center might just be the tipping point!
- Height – a friend of mine feels strongly about not having a fixed height in his shop benches. Well his for sure – but in general he thinks the bench height depends on the human user’s height. At 6 foot 6 inches it should be different than 5 foot 3 inches. Everything I read seems to settle on 36 inches or so. But still when you have you saw out to make the measurements – try different heights to see where the saw feels comfortable to you. And remember the height of the saw table from the floor will be the height of the bench.
- Width – here is where things vary a lot. Certainly, the width depends on how much space you have and what kinds of work you do the most. Someone making small furniture or jewelry boxes need less than someone working with long crown moldings.
As they say it’s all in the trade-off. If 90% of your work is – call it – smaller – set up for that. When you need more room, you can move things around. There will be more on flexibility later.
Wings
One way to address width is to have the wings or extensions fold down. You can even have one segment of fixes wing attached to one section of a fold down. The limit is of course the size of the fold down is limited to the height of the bench.
There are countless combinations of width configurations. But you get the idea.
There are other approaches. One creates moveable cabinets or tables on wheels. As long as they are the same height [including wheels] as the miter saw bench you can move them around as needed.
Multiple machines per bench
Some small shop owners solve space issues by placing more than once machine on a bench or table. I’ve seen combinations of table saws and miter saws on the same work surface. And you probably know that some approaches mount a table saw and a router on the same surface.
I am not a big fan of table saw and miter saw combinations because the miter saw stick up over the table surface and get in the way. There are plans for a miter saw / table saw approach where the miter saw swivels out of the way. That seems awkward to me.
However, I can see what I feel tools that essentially linear in their cutting tasks being mounted on the same table. For example, a miter saw and router. Or even a miter saw and drill press / mortise.
Storage requirements and opportunities
And this gets into the real space issues in a shop. Where to keep things? How to hide them? Anyone for organizing?
If you browse the internet looking at chop saw bench plans, you’ll see anything from the most basic stick structures with shelving to cabinets with doors and drawers. Wow some of those look like my kitchen!
Without getting specific there are three options for storage.
- Open shelving – good for longer things like lumber.
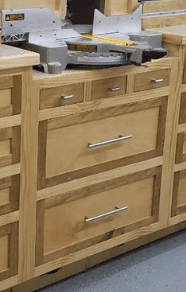
- Drawers – my favorite since I’d rather pull them out than bend over to reach in to retrieve things. Beware of tip over potential.
- Doors – good for hiding things away. Some feel doors on the section of their workshop bench plans that holds the miter saw must have doors for dust and chip control.
Of course, size varies both horizontally and vertically. The overall miter saw stand is the limit to the storage size. However, do not forget that more cabinets or shelves can mount behind the saw fence. And those might be on the bench or attached to the wall. For flexibility on hanging cabinets you might consider French cleats.
Material types – cost, look and feel
Many of the DIY miter saw stand plans found on the internet are made from 2 by 4 and screwed together. Plywood or MDF is used for the tops and, if there are shelves, shelving.

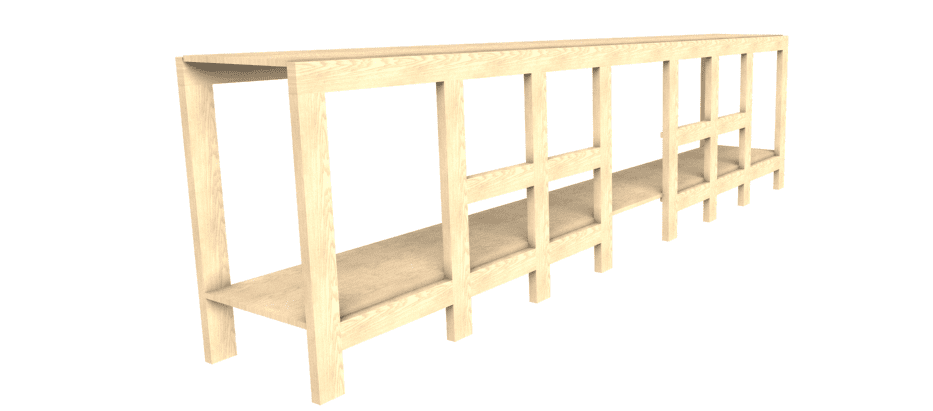
Well a very rough design for that might look like this. No cut out for the miter saw in the center exists on the design as of yet. The material required – 2 X 4 X 96 is about 10 pieces and 4 x 8 sheet – 2 pieces. Total cost? Depends on what you pay in your area.
Again, a sacrificial top may allow replacement after wear and tear. Remember to round the corners of the edges all over.
On the other hand, more attractive and expensive materials can be used.

Power and Dust Control
Miter saw dust shoots dust and pieces in every direction, making it hard to collect. The dust ports on most miter saws don’t work that well. Even when hooked up to a vacuum system, mess happens.
If you like, take a look at this web site for some good information.
“There are so many different ways to contain miter saw dust, with varying results. Some only work for saws without the sliding mechanism for cutting those wide boards, so check the depth of yours before you start building!”
Many options exist for power. The basic requirement is power for the saw. You might want to add an outlet for the shop vac. And consider power for a light.
Using SketchList 3D
SketchList 3D allows you to create a plan for your workbench in a very small amount of time and with little effort. Of course, designing the miter saw stand on the computer screen is easier and less costly – in terms of material – then doing a prototype.
Why and how can you use SketchList 3D?
- Consider and explore options – using SketchList 3D create your chop saw bench plan allows you to try an unlimited number of configurations. With the computer can easily alter the height, width and depth of the bench. This early design state is where you might explore combining different tools on the same bench. Remember the suggestion about putting a router into the same structure as the miter saw. With SketchList 3D you can even “load” boards of different sizes onto your miter saw bench top to see what it would be like to handle them.
- Check out the details – I found one design where a contractor type table saw and the miter saw built into the same worktop. The challenge was creating a way to rotate or flip miter saw so it didn’t interfere with cutting large sheet material when using the table saw. Design complicated parts, like design for the supports, blocks, and axle like pipe around which the rotate happens in software. Much better to create that design in SketchList 3D and tweak it as necessary.
- Place it in your shop – you can model your whole shop in SketchList 3D. Personally, I think it’s completely acceptable to create three-dimensional blocks to simulate your machine tools. All they need is the proper size. Another hint for you on this is to place a board underneath the machine tool on the floor. Sort of like a rug. If you size that board to accommodate clearances needed when using the tool, it’ll give you a better layout.
Summary
A miter saw bench plan is an exciting project for your workshop. The process of laying out requirements, your desires for the piece, and space/size considerations starts you toward a excellent working saw bench. You can create the most basic bench plan from lumber or even recycled materials. Or you can indulge yourself and create a work piece with doors and drawers and shelving and make it look like furniture.
Create several different alternatives and print them out as shop drawings with dimensions. And create some nice three dimensional images to give you a sense of space and mass. After you finalize your design generate the cut list, and maybe a layout diagram for your sheet goods. Then take it off to the lumberyard along with your credit card.
Next stop is the shop to build it all. Enjoy yourself.