Cabinet design software – learn how to use it in an evening.
Introduction to cabinet design software.
The main concept in SketchList 3D cabinet design software is that you design with boards, organizing them into containers.
Containers can be the project that’s the high-level container, or assemblies within the container. Below the assembly level, you have doors or drawers, a door. and hardware.

Process
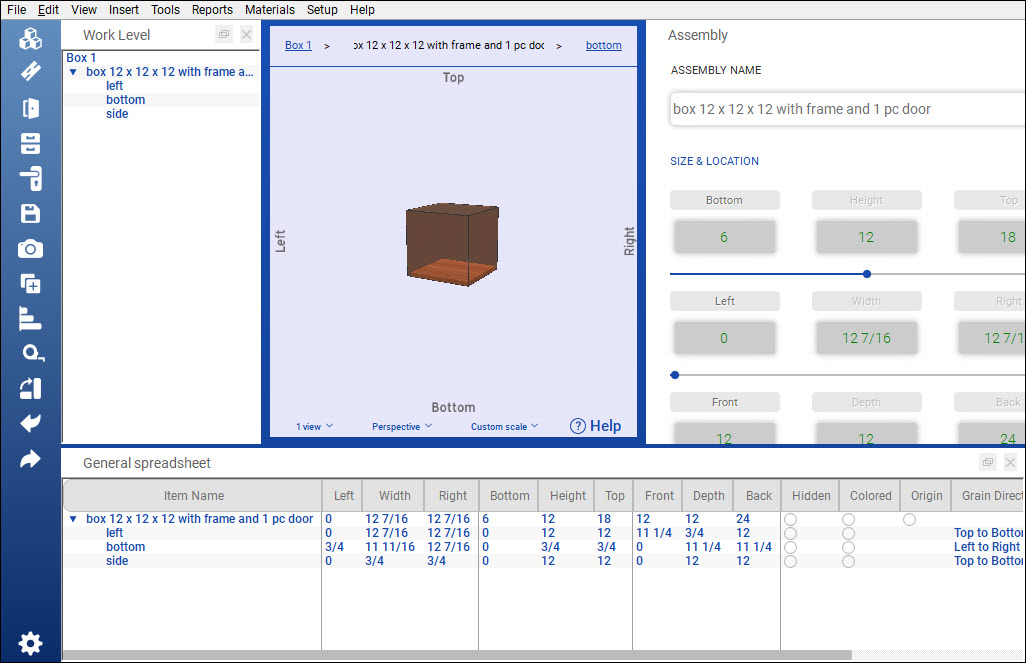
There are three steps in SketchList 3d, insert, size, and locate. The size is the width of the object from edge to edge. In this case, the distance between the left edge and the right edge is 12. The location is the distance between the left edge of the object and the left edge of its container.
In order to work in any container, you have to be at the proper level, I want to insert a board into this drawer. For example, I double-click that to get into the drawer level. And I’m all set.
Now I can insert a board. And the next step is that of sizing.
See the video.
There are three tools for sizing.
- One is the red dots, I can right-click that changes size, like that.
- The other tool for sizing is the form. So I could change the width from eight to six and click the button right and that becomes the new value.
- Or I can do these on the spreadsheet. Say the height is four and click the top column heading and four inches we’re taking off the top of that board.
There are three tools for locating in SketchList 3D cabinet design software.
- The first is the blue dot. I click the blue dot and hold down the shift key, I can drag this object anywhere. Although with the lack of control. I right-click that blue dot, I could set its value for the location exactly. And you’ll see that that’s where it’s located.
- I can use the form for location. I wanted to move this six inches up from the bottom type and six. Click top. Put that all the way to the left type zero, click right, and same for the front back. The front is 12 back is located accordingly. There’s another if I go into the assembly level by double-clicking it.
- The spreadsheet will also locate an object. When you enter the new value to the corner point and click the column header to change it.
The other way I can use the blue dots is to right-click the blue dots, copy their value. Right-click this blue dot paste its value and you’ll locate those two objects exactly together. Do that again. Copy and Paste. Now, these three containers all but together.
Boards used in cabinet design software.
Now we’ll consider what a board is in SketchList 3D. Insert a board into the assembly. A board can go into the assembly or a door or drawer. IA board can’t go directly into a project.
In the upper left-hand corner, I click the new board icon and give the board a name.
Pick the material. Then enter the width of the board and its height and its depth. The depth is the thickness, in this case, select the grain direction and click Add board. And that’s the board.
Now with these concepts and steps, you can virtually build almost anything in cabinet design software.

