A manufacturer wanted to see how SketchList 3D would work as case design software.
There is plenty of detail here, a review of all reports, and a good example of the kinds of information you get from SketchList 3D. It applies to manufacturing, cabinet making, remodeling — anywhere you need to model, manage and produce your work.
The first step is to determine your output requirements, the first of which are the images.
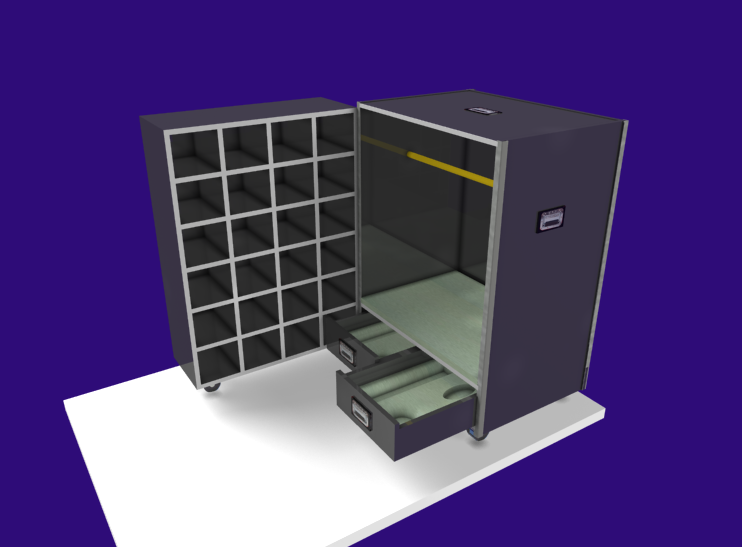
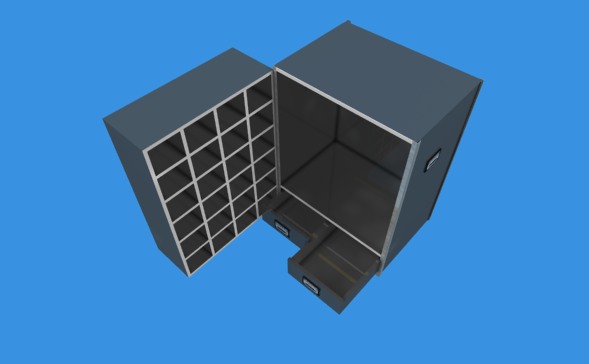
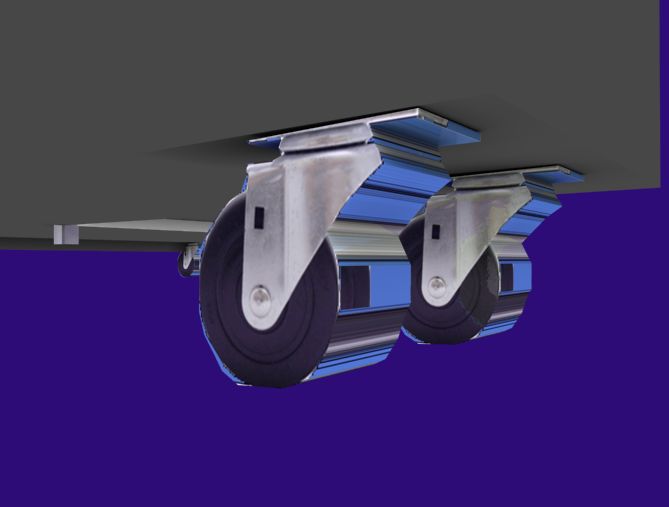
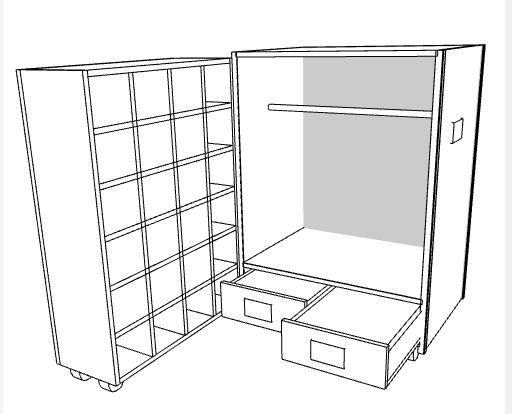
The door would have a hinge allowing it to close against the back part of the box. The two drawers would also ‘close’. There is a round metal bar for hanging clothing and a set of heavy rubber casters on the bottom.
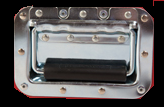
A large part of the quality of the image has to do with images available for use [like the handles], angle or view of objects, background color and light adjustments.
One report available in SketchList 3D is PDF output. This exports the design to a file that Adobe PDF reader [free software available from Adobe] can open or your or your client’s computer and actually move the design around on the screen.
In addition to being able to examine all views of the design, the
users can change lighting, make a line drawing, and modify their view of it. SketchList 3D users tell me they love this feature. Remember they can rotate it with their mouse.
The PDF can give different looks. And it’s free.
Other types of outputs include the following:
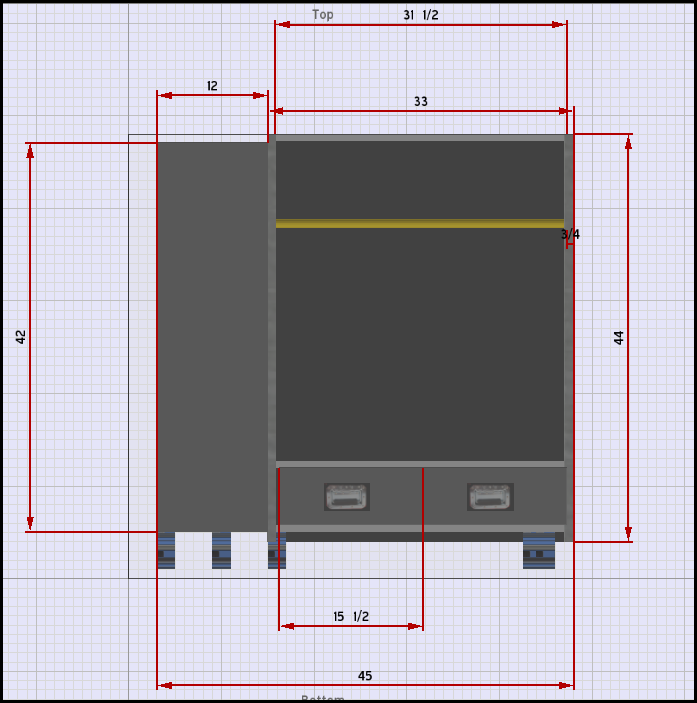
- Shop drawings – this example shows a standard drawing. You can make as many drawings, as detailed as needed, as you want.
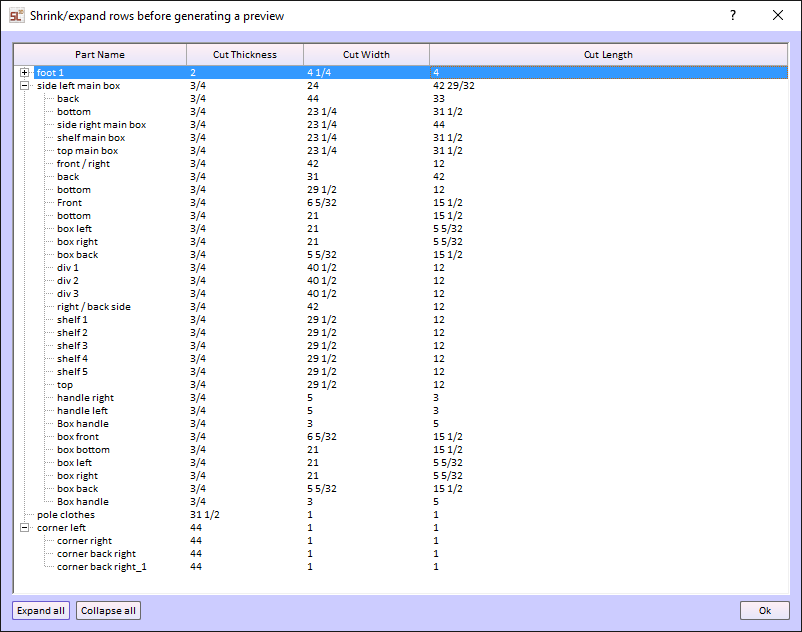
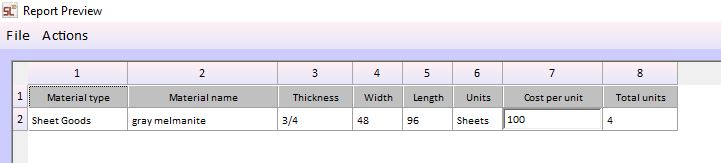
- Parts List – any part of the design can be shown or not on the parts list. The list can be sorted many different ways. You can specify – for example – only parts of a certain thickness to be shown on a reports list. The parts list can be exported to a spreadsheet for more work – for example inventories. Of course you can print it.
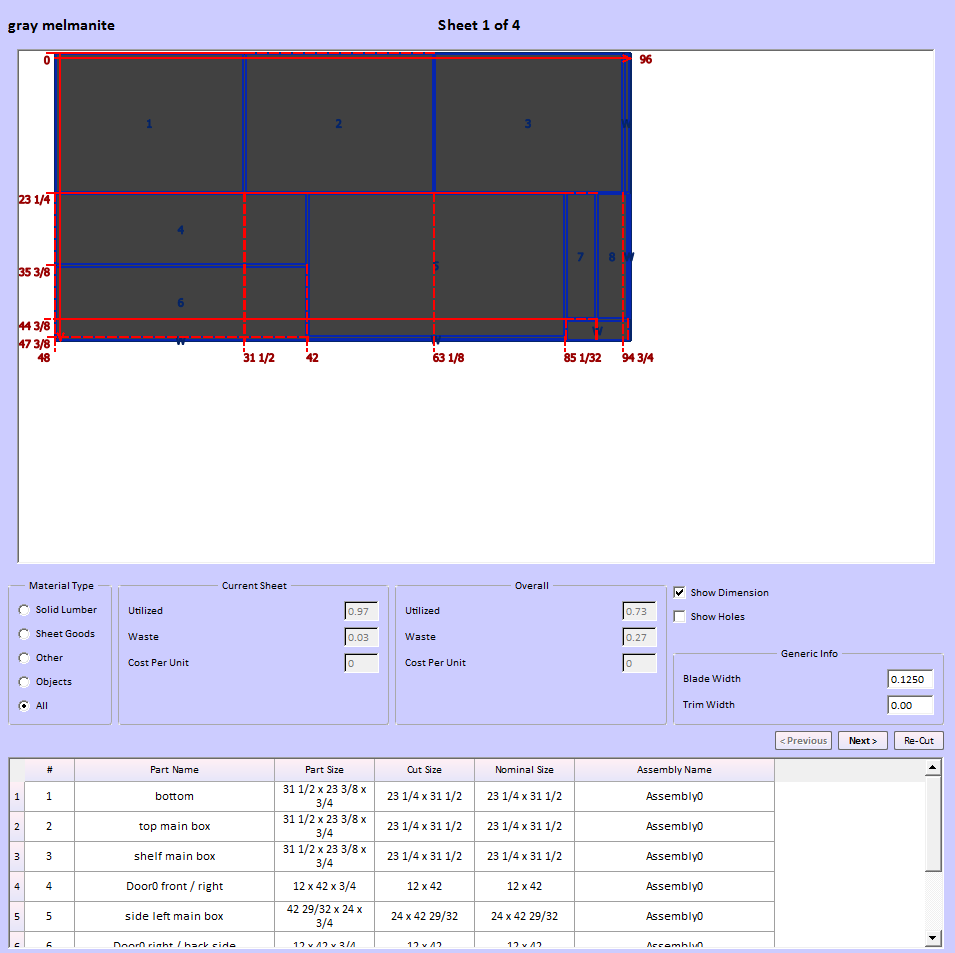
- Optimize material layout diagrams. SketchList 3D will take all parts and lay them out on the specified materials in a way the reduces waste.
- Purchase report.SketchList 3D takes the material requirements from the layout function, aggregates them, and produces a report showing how much of each type of material is needed and what that costs. This example from the travel box is very simple.
- Export to DXF files for use by your CAM software is generated from the layout function.
Consideration of the objects of each output is important. Certainly drawings and reports go to the shop. They will also be part of proposals to potential customers, input for estimating and quoting jobs, and web page and marketing materials. Each use of output starts with the same information and perhaps presents it a bit differently.
The other desired output is a library of standard designs, components, and parts. The travel box design incorporates wheels, handles, and corner material which can be saved as standards.
One early task in implementing SketchList 3D might be to create a list of the contents of the library. Of course this can be done as you go along, but experience shows this can result in multiple parts which are really the same with different names.
Once a library of “boxes” is created, new projects can be a matter of taking an existing ‘box’ and changing its size. This may be the entire process or you may make other types of modifications – such as adding drawers.
The output will definitely adjust as you gain experience with the software and the process.
Planning the setup steps is important.
Again this can be done as you progress, but some thought should occur front end.
When you start you will put some effort into determining the elements of your design.
- Joinery types – what kinds of joinery do you use and where?
- Materials – standard materials for all jobs and/or custom material for custom jobs?
- Materials cost – entering what you pay for the materials and vendors.
- Report contents – what data will be on the reports.
- Customer setup – entering customer information and including it on report headers.
Thinking about design structures.
The effective use of assemblies and sub-assemblies greatly enhances productivity. This is a skill you will develop as you become more experienced with SketchList 3D. For example, in the travel box I used one assembly and included in it a large door. That might have been two assemblies – there are advantages to each approach.
Starting
There are several steps. Once you purchase SketchList 3D you can begin training and setup. We do remote training via the internet and telephone,
Many customers find they become very productive with only two training sessions. In the first we cover basics and begin to design a project they are about to begin. At the end of that session probably 80% of the work is finished. The user will attempt to finish the other 20% on his or her own. During this time, I answer questions via email, phone, of sometimes with an online computer connection. The second session covers final questions, resolves problems or misunderstandings, and reviews report generation.
The two session approach works because in the case of a customer woodworker – there is really not that much complexity. They know how they build, build more or less the same thing over and over, and usually do not use the entire set of features of SketchList 3D [at least at first].
Your situation may be like that or may be more complex. The more detailed cutting of foam inserts, more complicated case interiors, different use of materials all can affect the time to learn and adjust.
SketchList 3D will provide you an easy to learn and use design tool that will enable you to create both custom and standard parts and products. Your customers will love the images they will see before buying. It is certainly easier to get sign off when you have a detailed picture of what they are paying for.
Creating a standard library of objects will help you quickly and accurately create new designs.
The parts list, purchase list, cutting diagram, shop drawings, and DXF files will help you manage your production.