Case Good Design – make sure to leave room on the front for frames and doors.
Next question from a user that might apply to more than this one person who was doing a case good design….
“If I want to add the doors at the end and forgot to leave front space for them I wasn’t able to move the whole assembly with exact 18 mm to the back to leave space for the doors without messing up the whole project – I had to start fresh again with the doors first.
I select assembly, input front 18, click on back for automatic calculation asks me for automatic resize and after it gives me error and dimensions come back to original. Moving with mouse is not exact and I get values with comas and is not that useful.”
I hate when I do this! And I still do – after nearly ten years. This very situation caused us to develop the batch move function. In Adrian’s case he needed to push everything in an assembly back by 18mm.
Normally this means every value of ‘front’ in you case design needs to change from 0 to 18 and MOST of the corresponding ‘back’ values changed to move the board backward. An exception happens when you need to shorten a board – like a side. Then the front goes from 0 to 18 and the ‘width’ changes.
A few other precautions.
The project depth must be large enough to hold the new size of the cabinet.
The assembly depth must be changed to fit the newly located and sized boards.
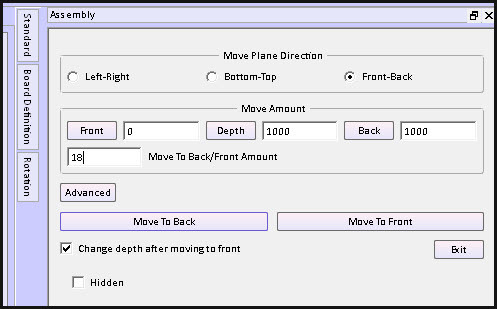
BUT WAIT. You are much better off using the Batch Move method.
- Make the project depth big enough to hold the new depth of the assembly. If may already be big enough but be sure to check.
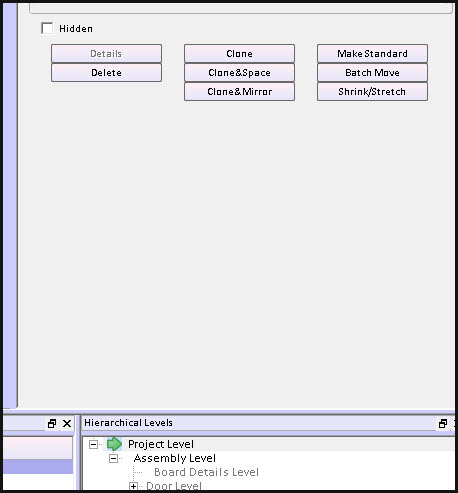
- At project level – select the assembly you want to change and click the Batch Move button.
- Click – in this case – Front-Back
- Enter the move amount
- Chose Back or Front – pick accordingly.
- Exit
All set.