Categories
Blog Uncategorized Version 4 Woodworking Business

Furniture Design Software – Using Slider Bars

Slider Bars to Move and Size

Ability to Slide Objects in 3D Speeds Design

Immediate visual feedback on design changes is critical to furniture  design software productivity.  The ability to try different options and ideas and instantly see their image vastly improves your design and product.

With version 4 of the SketchList 3D  furniture design software we have achieved this ability of sliding objects back and forth up and down right and left on your screen.  But more than that we’ve integrated the parametric approach of typing in specific values (for example 14 7/16 ) to get to a specific place in your three dimensional models.

This is truly a feature  which is better experienced and seen then talked about. A picture may be worth 1000 words but with the sliders with video  is worth everything.

Take a look at this video to see what I mean.

[responsive_vid]


Categories
Blog Uncategorized Version 4 Woodworking Business

Furniture Design Software – Manipulate those Assemblies

Reception Desk in Cabinet Design Software

Achieving design flexibility while saving time

With sketch list 3-D furniture design software you can  create designs that meet your customers needs. The flexibility provided by manipulating a virtual boards on the screen, along with the instant visual feedback  of the shape and proportion of your the design allow you to explore many  alternative approaches for your design.   Because it is quick to design using this virtual board concept you can accomplish a lot in the minimum amount of time.

One powerful addition to the SketchList 3D toolbox is the clone and mirror function.  What it does is to make an exact copy of an assembly with one exception.  That exception being that everything  in the assembly is changed left to right.  Take a look at the reception desk in the image beginning of this post.  The reception desk started as one unit  – that towards the left-hand side  – that was curved and shaped as a bit of a quarter circle  desk.  Cloning and mirroring the first assembly allowed the design to go from a quarter circle to a semi-circle in two mouse clicks – literally taking a second or two.

A commonly used application of clone and mirror is an entertainment or bookshelf unit. You may create one assembly with,  for example,  doors to the left and shelves to the right.  For the second assembly  you want to  put the doors on the right and the shells to the left. You have three choices.

  1. You can completely rebuild the entire assembly.
  2. You can clone the us existing assembly and manually move the doors and shelves.
  3. Or you can choose clone and mirror.  after the clone and mirror of course you need to slide the assembly to the right or left to locate it where desired.

This video shows how I cloned and mirrored the quarter circle  reception desk turning it into a semi circular unit.   One of the key advantages of using  software for your furniture design efforts  the ability to  save time while  exploring many alternative designs to achieve the best  solution for your customer.


Take a look….


Categories
Blog Contractor Demonstration Uncategorized Woodworking Business

Furniture Design Software – File Management

When someting goes wrong with your Furniture Design Software files…

I got an email from a user that we can turn into a bit of – as they say – a teaching moment.
“My computer just updated and now I have nothing…I have many projects that are just gone!  HELP!

computer destroyed

Our programmer linked into this user’s computer and found that something wierd happened to the file causing the customers  in that file  to be deleted.   It took about an hour but it was fixed.

The result was,  in the words of the user….

“Thanks for fixing this!  I was a little stressed…you guys rock!”

Now actually  the amount of emails related to file or disk failure is extremely low — like maybe one every month or so.  But disks do fail and files do become corrupt.  And the resulting work to get data back, if even possible, certainly justifies the time it takes to do some backup.

To help you better manage your SketchList 3D files I put togeter this video.
[responsive_vid]

However – the one, sure, rock solid thing I do (meaing it’s a good idea 🙂  ) is to export individual projects from SketchList 3D and save them to some external device.    Mine is a flash driture drive labeled “projects from furniture design software” work.   This way – if all else goes to, well, you can move these to another computer, or a new drive, or whatever.


More later,


Dave Rozewski

Categories
Blog Demonstration Home Office Design Uncategorized Woodworking Business

Home office – furniture design software 3d model


Finally it’s ALMOST finished.  I had been asked to put together a series of videos on one project.  I choose a desk that I might actually build someday.  The front assemblies – left and right – close back on the center unit.  The backs of those assemblies have five piece doors on them to make it look more like furniture.  It’s a case where woodworking software allows me to “build” something before I commit to it.  The shop drawings and optimized parts layout diagrams will help me do the planning.  Parts list and purchase lists – of course.

The real kicker is that the video accompanying this design is about 90 minutes long (bad – too long) BUT it is indexed so you can so directly to – for example face frames ( good – complete).

I noticed after that I overlooked hardware.  I will get to that and put on an extra segment.

If something is missing – let me know.

This video even covers file management – answering often asked questions like “How do I restore a file?”

Let me know what you think.

Thanks,


Dave

Categories
Blog Contractor Woodworking Business

Furniture CAD Software – What is CAD anyway

I think many people have a rough idea what we mean when we say CAD.  C  for computer, certainly.  A  for aided or assisted – you pick.  D for design or drawing.  I say drawing.  But hey – again you pick.   The basic idea with CAD is that you use your computer to draw things you hope to make.  But just like tools in the shop  – there are many approaches,  varieties, and levels of quality – and many opinions about which is better.

I have resisted throwing SketchList 3D into the CAD pool, since for many CAD means ‘very hard to use” and I have worked at staying away from many of the CAD approaches to drawing (e.g. X,Y,Z) to overcome the difficulties.  But none the less – I find that people searching the internet and finding me used furniture CAD in their searches – so here we are!

Furniture CAD - hand sketch


Here’s my take on CAD after nearly 45 years of drawing things I intended to build or have someone build for me.

My first attempt at mechanical drawing, as it was called back then,  was at Erie Community College – just outside of Buffalo NY in 1969.  I went to the bookstore to buy my supplies.  Those triangles, scales, tee square, eraser (critical tool)  and all else on the list were really cool.  (Both “mechanical drawing” and “cool” indicate I am of a different era.)  Then I went to class and sat at my drafting table.  It was impossible to draw the line my instructor wanted – uniform thickness – no smudging.  I could barely keep my pencil point pointed!!!   And to clearly have two lines meet?  Well just say that my drawings were at the lower end of the class in terms of quality.  It was a tough semester.  No job prospects as a draftsman.

Decades later  the computer that fit on my desk was being sold.  The computer  could  ”draw” lines of uniform thickness – and if you were real careful with the mouse —  it let two lines meet exactly in a corner.  Home free – no smudges.  Where were you, computer, in 1969?

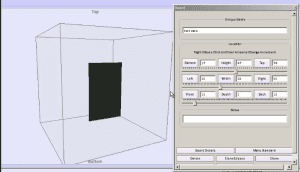
Move ahead to the times when the basic drawing packages have long been replaced by this thing called CAD, which in my opinion automates the drawing of lines.   It took what was for me  a painful process of drawing lines and made it easier.   But you see it could have done soooo much more.

[Diverging here:   I heard a radio story about LED lighting.  An engineer was telling of the potential of  LED  lighting  – like being “painted” onto a wall to make a very large light.  But interestingly – the basic LED bulb target output was  60 watts.  Why? Because that was what dear old Edison picked and — we don’t want to be too different now, do we?  And why did Edison pick 60 watts of output?  Because – yep you got it – that was roughly the output of that amazing technology of his time – gas lights. I wonder if the cave torch was also rated at 60 watts. So here we are with LED technology picking a standard set by a lighting system hundreds of years old.   Having  the computer draw lines for design  is like using 60 watt LED lights.   It could be so much more but its developers were looking backwards at the drafting table and tee square.   They should have instead looked forward to the design and building process.]

When using computers in design – furniture CAD we might call it , we can choose to stick to the 60 watt bulb approach or take full advantage of  new technology.

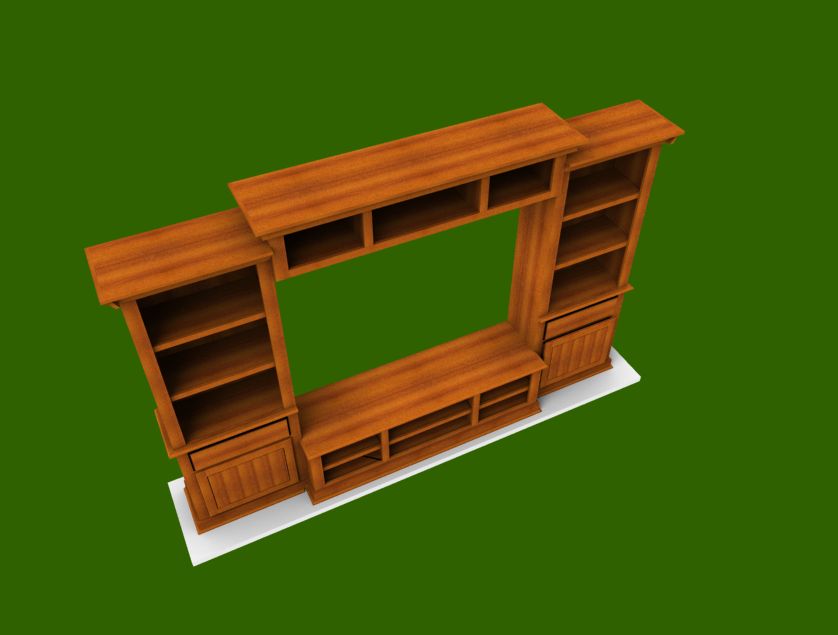
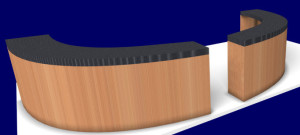
What is the difference?  Instead of drawing lines to make rectangles and rectangles to make cubes to make our woodworking projects – let’s just jump ahead to using the computer to model actual-virtual  3D boards (think!).    Then we can easily move these boards around in 3D space — getting  instant feedback on our designs.  Somewhat like moving pieces of wood around on our assembly tables or workbenches.  At that point we are not involved not with lines and boxes, but with our design.

And if the software is  easy enough to use and we can  learn to do this in an evening or maybe a day — then we really have computer assisted design.

Entertainment center - furniture CAD