Laying Out the Virtual Kitchen – Cabinet Design
Cabinet Design Process
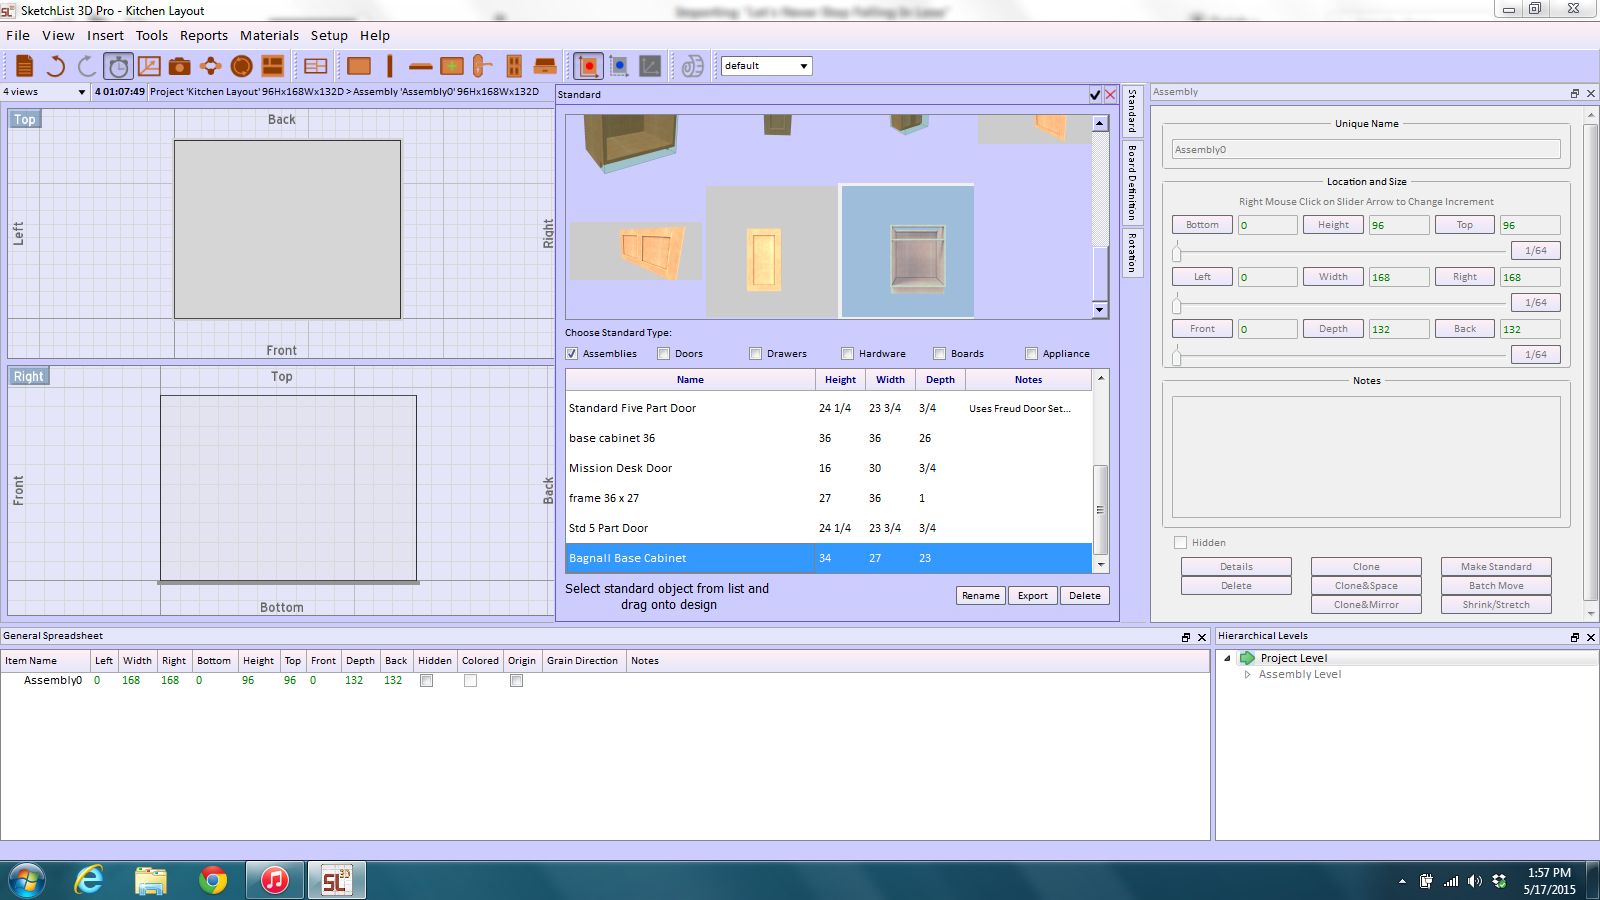
If you have been following my posts on learning SketchList Pro 3D, you should have cabinets “built” in the software, as well as doors, drawer boxes, drawer fronts, pull outs and whatever. You should have saved all of these as “Standards” and are now ready to place them in the virtual kitchen. Placing virtual boxes is a LOT easier on the computer screen than it is on site!
It is as easy as clicking on the “Standard” tab at the right top corner of the workspace. A new window pops up showing you your library which should include the cabinet(s) you created. Select the cabinet needed, and drag it into the workspace. It will default to the center of the space, so you need to adjust the “Bottom”, “Left” and “Front” measurements.
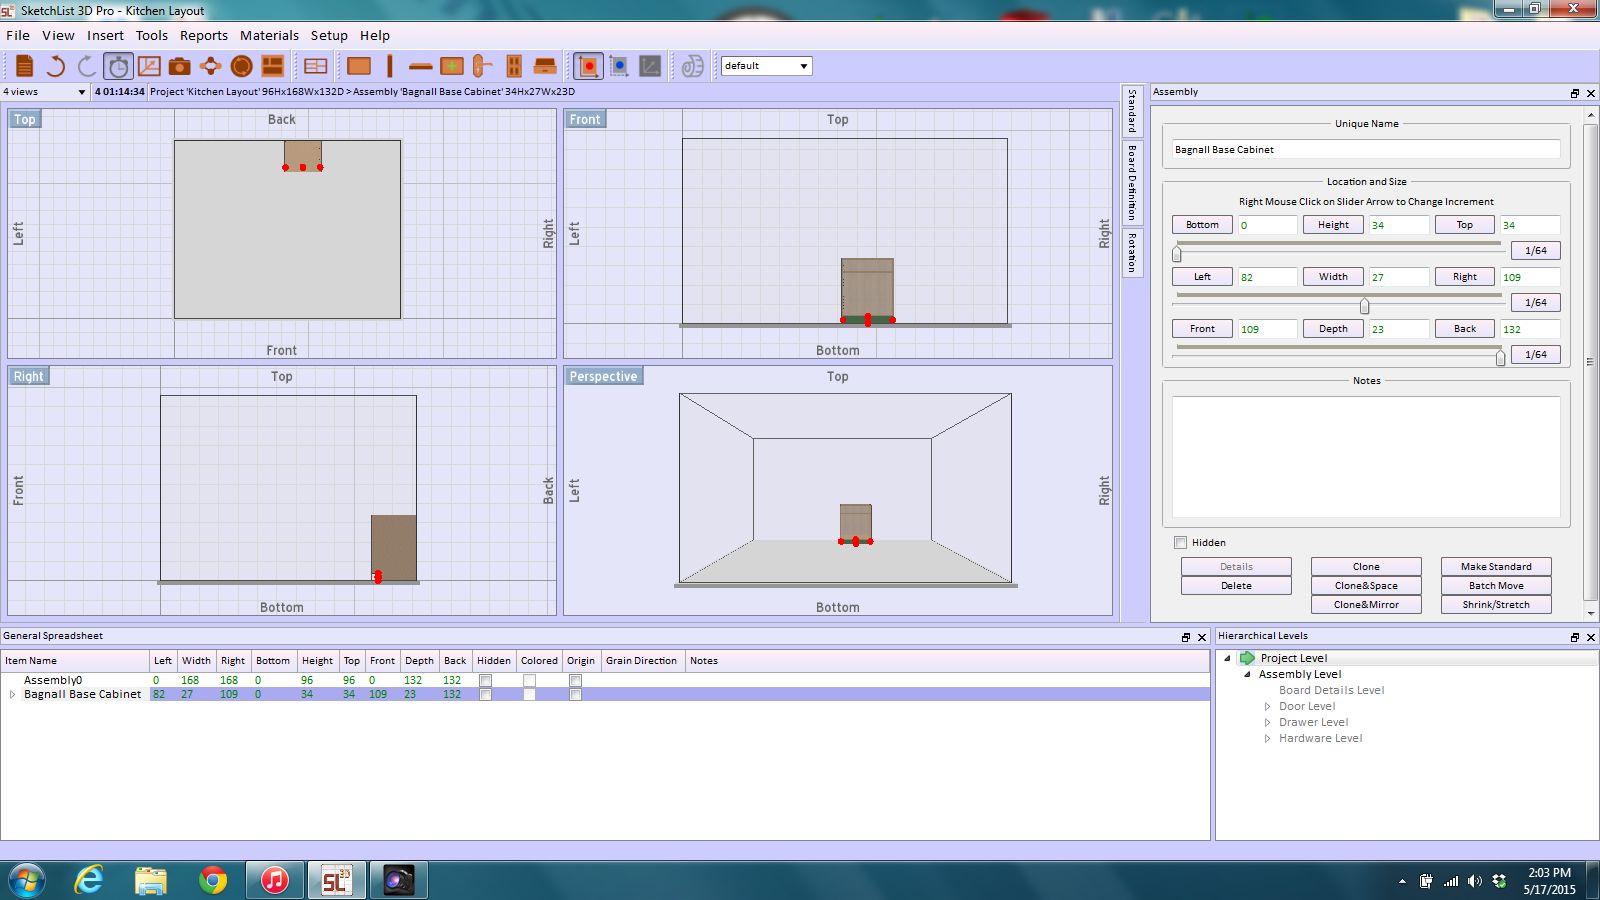 The “Bottom” measurement was simple, it should be zero since this is a base cabinet and sits on the floor. Enter Zero in the “Bottom” box. Notice that the “Height” and “Top” buttons will now show red dimensions since they need to be updated. The “Height” will not be changing so simply click on the “Top” button (not the dimension) and SketchList will do the math for you.
The “Left” measurement works the same way. Ideally, you can begin laying out from the left of the space so that too would be zero or maybe 1 or 2 inches for scribe. But not being quite that clever, I did a little math and came up with 82″ as my “Left” measurement. SketchList updates the workspace on the fly so at this point my cabinet is on the floor and laterally where I want it, but still centered front to back.
I could do the math to determine the distance to the face of the cabinet, but why bother when our kitchen design software will do it for me. Since the cabinet is being placed against the back wall of my kitchen, I can enter that number (132 inches) next to the “Back” button.
Now the “Front” and “Depth” dimensions appear red. Again, we will not be changing the cabinet, so clicking on the “Front” button updates this dimension for us. The second cabinet ‘installs’ exactly the same as the first, but is on the other side of the stove, so the only difference is the “Left” entry.
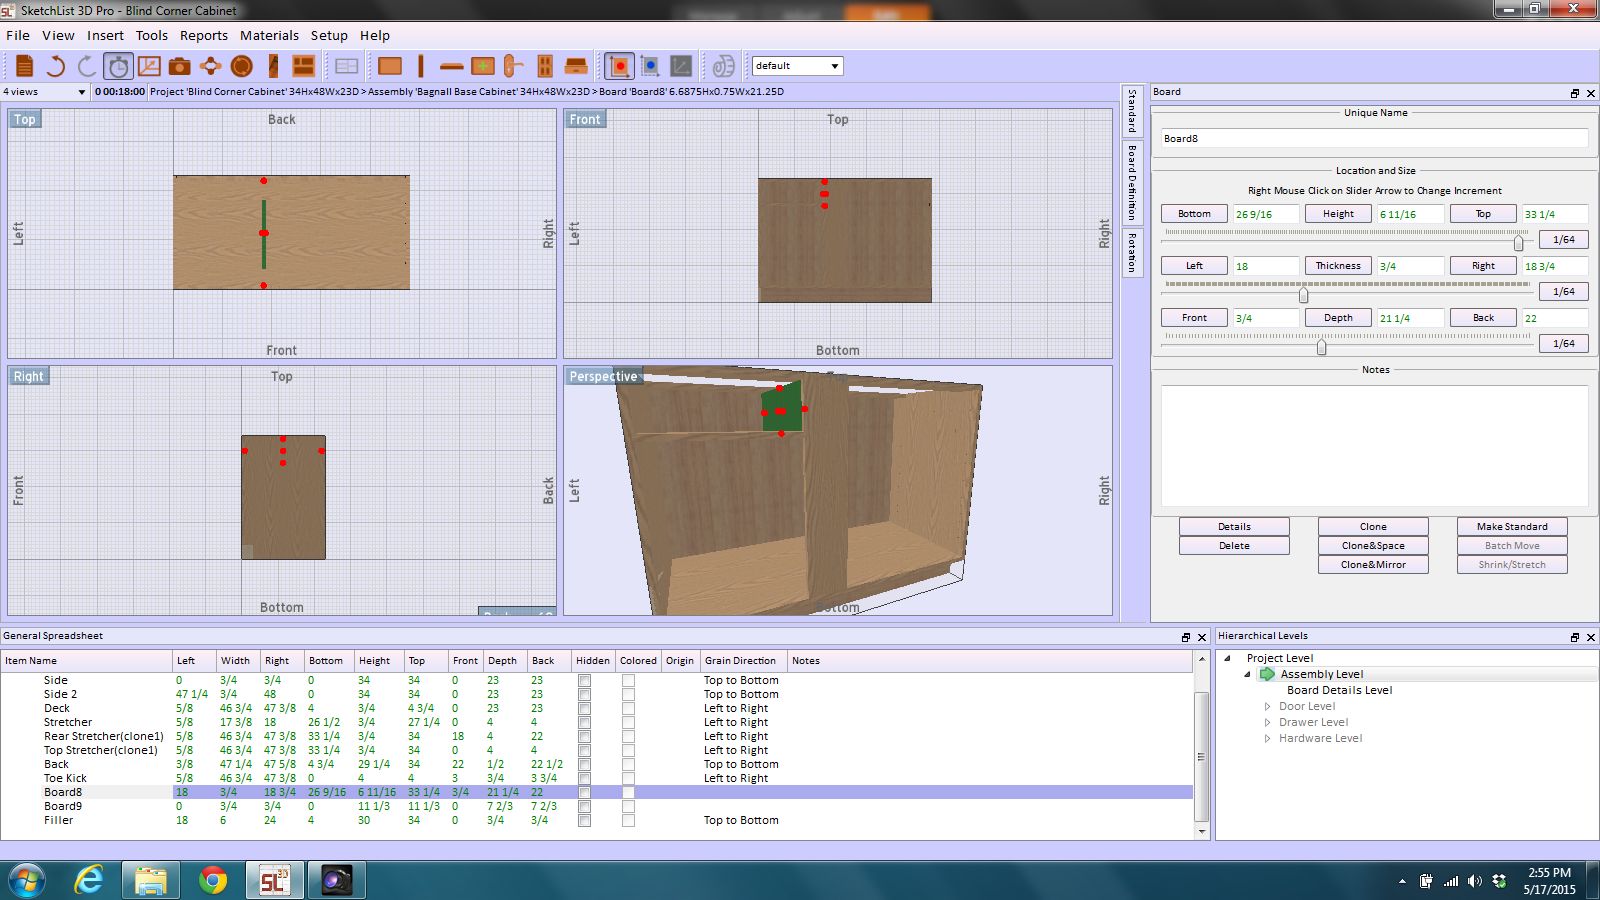
The next cabinet to be added will be a blind corner cabinet. While typical base cabinets can be stretched or shrunk within reasonable limits to fit the space, a blind corner is a different cabinet all together, so it is best to create it as a standard in your library.
To create the blind corner, I simply opened my base cabinet file, stretched it as needed, and added boards for the drawer divider and scribe. Now it too can be placed using the same procedure as before. The only difference is that it will be placed along the left side wall, it needs to be rotated by 90 degrees.
Select the cabinet once it is added to the workspace, you can either select the “Rotate” tab just below the “Standard” tab on the top left of the workspace. Obviously, this one is set to zero at the bottom, and zero to the left, and again it is set at 132 inches as it ends. Simple!
Next the cabinets along the front wall are placed. The process is the same, but in my kitchen, one is narrower than the ‘Standard’ cabinet and the other, the sink base, is wider. I found out at this point that stretching cabinets is much easier than shrinking them. You CAN do both, but the software just likes stretching better than shrinking. So get into the habit of creating your library cabinets as the smallest size you are likely to use and stretch all similar cabinets from there. [Note: SketchList is working on removing the issues with shrinking and this will be resolved in the next few updates.]
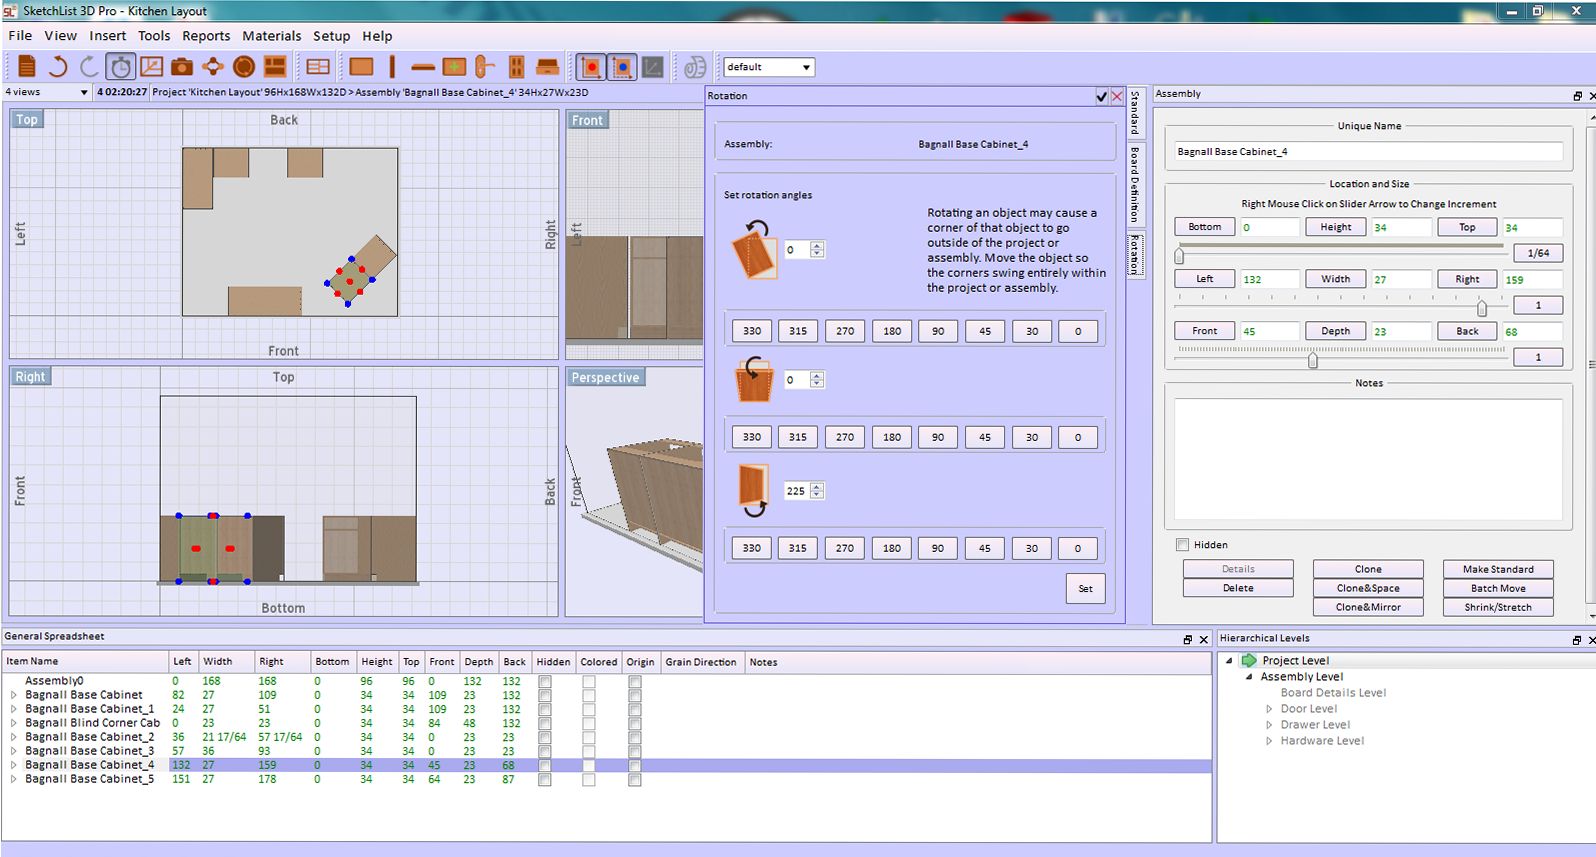
The final challenge was placing the two cabinets that form the peninsula. They are both standard cabinets, so no worries there, but they are set at a 45 degree angle to the front right corner of the kitchen. The rotate command does not have a 225 degree button so simply type that in rather than selecting one of the preset buttons. Once rotated, the positioning was a bit of a challenge since the 45 degree angle meant that my location point was not intuitive, but I found that rather than doing the math or measuring the layout, I could simply adjust the “Front” and “Left” settings until; the cabinets were placed as desired. Much easier than visiting the job site!
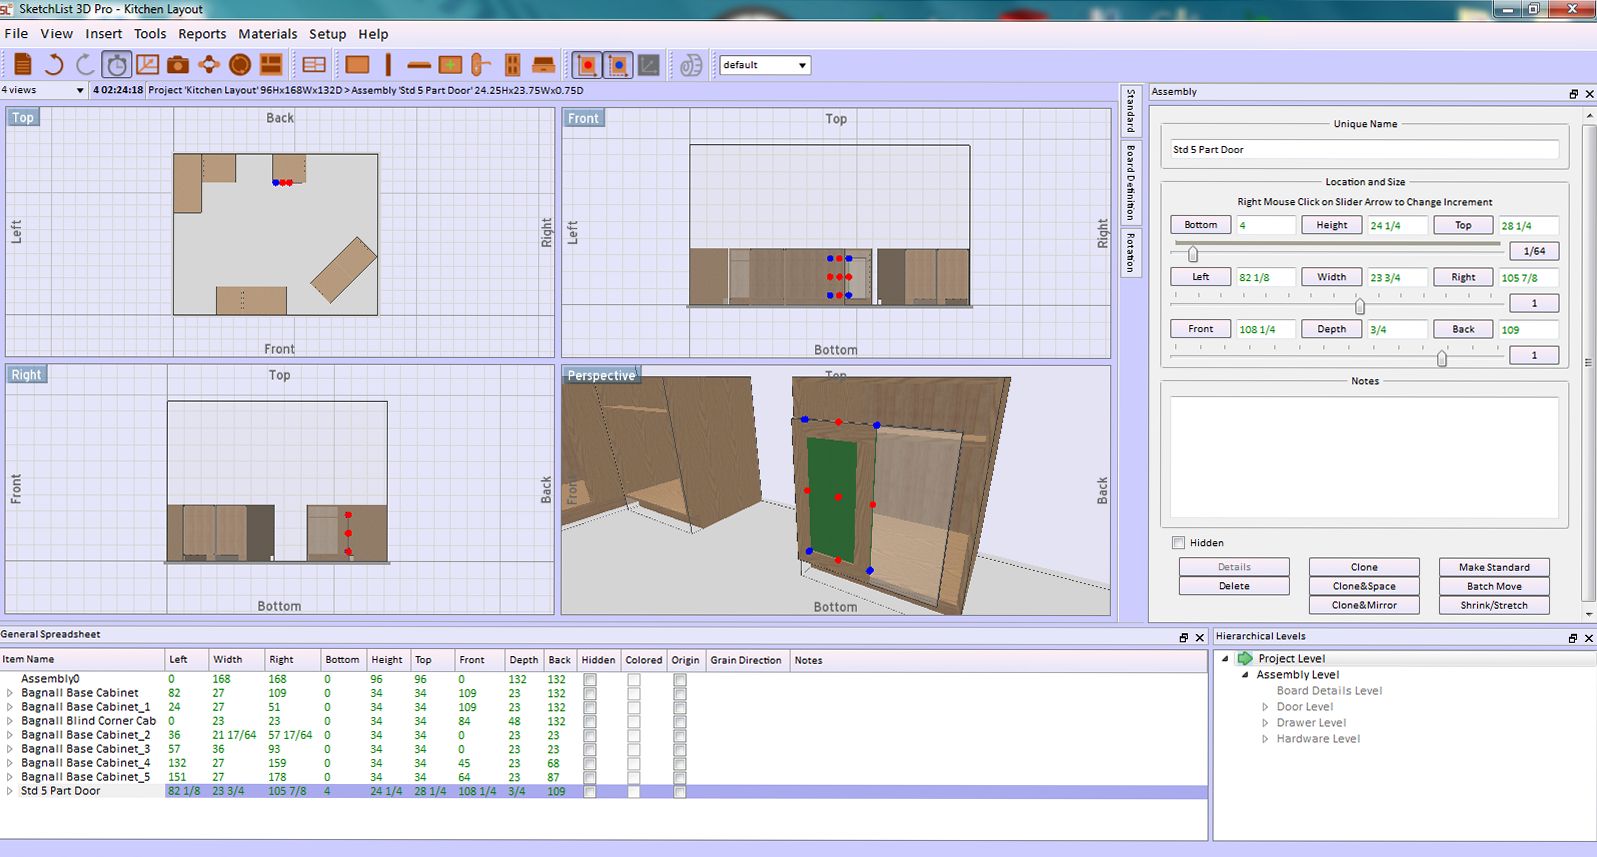
Finally, the doors, drawers and other details can be placed from the library. At first I thought this was going to be something of a pain since you need to determine the same “Bottom”, “Left” and “Front” numbers, but once again, SketchList Pro 3D provides shortcuts.
Looking at the cabinet list below the workspace on my screen gives me these numbers for the box. I know that the door is 1/8″ up from the cabinet deck, so my “Bottom” number is 4 1/8″. The “Left” edge of the cabinet is shown at 82 inches in the parts list, so I add an eighth to that dimension as well. And the back of the door meets the front of the cabinet, so for the “Front” dimension I fill in the “Back” space at 109″, and click on the “Front” button to reconcile with the width! Took seconds to place the door since all the info is displayed right along the bottom of my workspace! Adding upper cabinets is no different, you just need to know how high off the floor they will be.
I have used a great many different CAD programs over my 30 years in this business, and SketchList Pro 3D is one of the most intuitive I have seen for cabinet makers. It works like you do. Not with lines on virtual paper but by assembling individual boards and panels into recognizable objects. These can then be saved and placed into a known work space just as you would on the job site. I know of no other program that gives you both 3D renderings to sell the job to a client AND the cut lists and optimized material layouts to actually build the job with should you win the bid. Download the trial version and give it a run following these blog posts and see if you are not as impressed as I have been.
David Rozewski
My woodworking love started in 6th grade in school shop class. I have a BS in Industrial Technology and an MBA. At my first job, I computerized a production accounting system – the results were positive, and I loved the challenges. I left the corporate world to begin woodworking full time and one of my first decisions was to use CAD for my designs. I found that CAD did not meet all my needs. I wrote a specification of what I wanted and turned it into a prototype. SketchList 3D incorporated in 2007. We completed programming and launched. Today thousands of woodworkers use SketchList 3D.


