Categories
Basics and How to Version 5

Furniture design app used to design kitchen storage.

Introduction to SketchList 3D

furniture desing app image

As a furniture making using a furniture design app, I have spent a lot time in the design process. From conceptualizing a design to creating a 3D model, it can be a time-consuming and tedious process. However, with the SketchList 3D app, I have found a solution that streamlines my workflow and makes the design process more efficient.

This is a project video in which a fairly complex design is done in SketchList 3D. Although a bit long at 20 minutes, it does a good job in showing the flow of the process, the way the library is used to get a quick start, and how most of the tools are used to quickly achieve your design. And remember this is a starting point from which you can explore modifications until you reach the perfect solution.

SketchList 3D is a furniture design app that has revolutionized the way I approach design. The app is specifically designed for woodworkers, furniture makers, and cabinet makers, making it the perfect tool for the job. It has a wide range of features that make designing furniture a breeze.

Benefits of using SketchList 3D for furniture design

One of the main benefits of using SketchList 3D for furniture design is the time-saving aspect. With this app, I can quickly create a 3D model of my design, which saves me a lot of time. It also allows me to see my design from all angles, which helps me to spot any potential issues before I start building.

Another benefit of using SketchList 3D is the accuracy of the measurements. When designing furniture, getting the measurements right is crucial. With SketchList 3D, I can input the exact measurements of each piece of wood and get a precise 3D model. This means that I can be confident that my design will fit together perfectly when I start building.

Features of SketchList 3D app

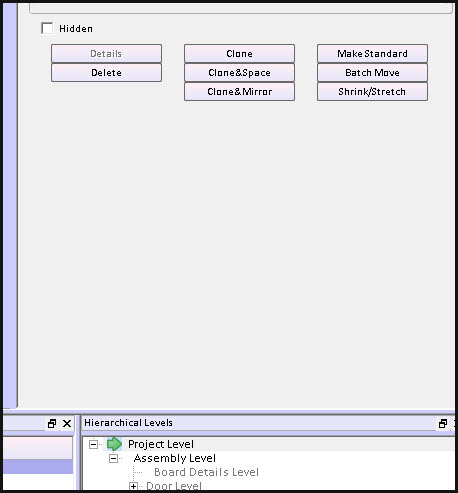
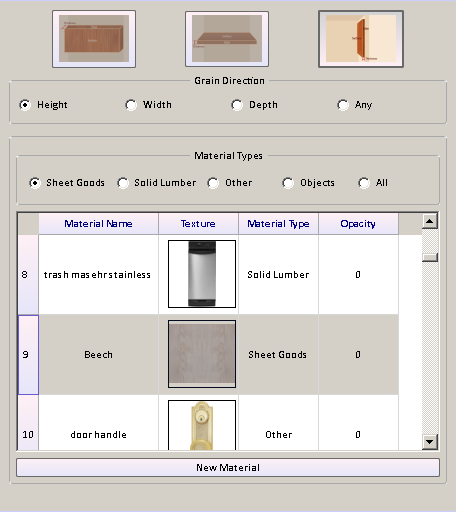
SketchList 3D has a wide range of features that make it the perfect app for furniture design. One of the key features is the ability to create a 3D model of your design. This allows you to see your design from all angles and make any necessary adjustments before you start building.

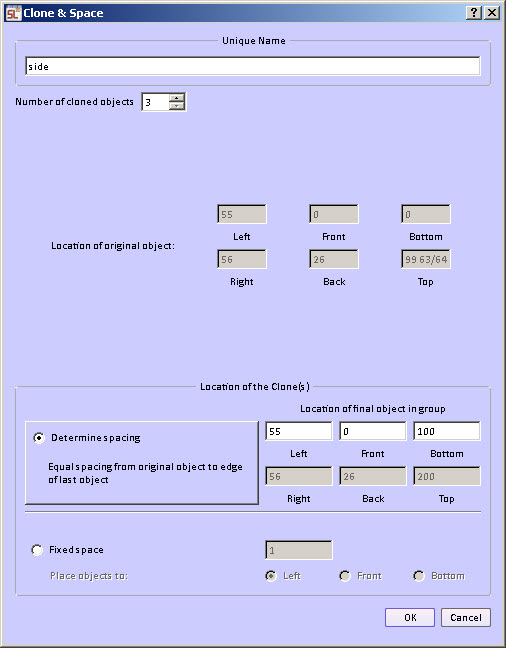
Another great feature of SketchList 3D is the ability to create a cut list. When designing furniture, it’s essential to know exactly how much wood you need for each piece. With SketchList 3D, you can input the dimensions of each piece, and the app will generate a cut list. This saves a lot of time and ensures that you have the right amount of wood for each piece.

SketchList 3D also has a 3D rendering feature, which allows you to see what your design will look like in real life. This is a great way to get a sense of how the finished product will look and make any necessary adjustments before you start building.

How SketchList 3D improves furniture design workflow

SketchList 3D has improved my furniture design workflow in several ways. Firstly, it has made the design process much quicker. With the ability to create a 3D model of my design, I can quickly see what it will look like and make any necessary adjustments. This means that I can spend more time building and less time designing.

SketchList 3D has also made the design process more accurate. When designing furniture, accuracy is crucial, and SketchList 3D ensures that my measurements are precise. This means that I can be confident that my design will fit together perfectly when I start building.

Tips for using SketchList 3D for furniture design

If you’re new to SketchList 3D, here are some tips to help you get started. Firstly, take the time to learn the app thoroughly. There are many features, and it’s essential to know how to use them all.

Another tip is to use the app to create a cut list. This will save you a lot of time and ensure that you have the right amount of wood for each piece.

Finally, be sure to use the 3D rendering feature to get a sense of what your design will look like in real life. This will help you make any necessary adjustments before you start building.

Examples of furniture design created using SketchList 3D

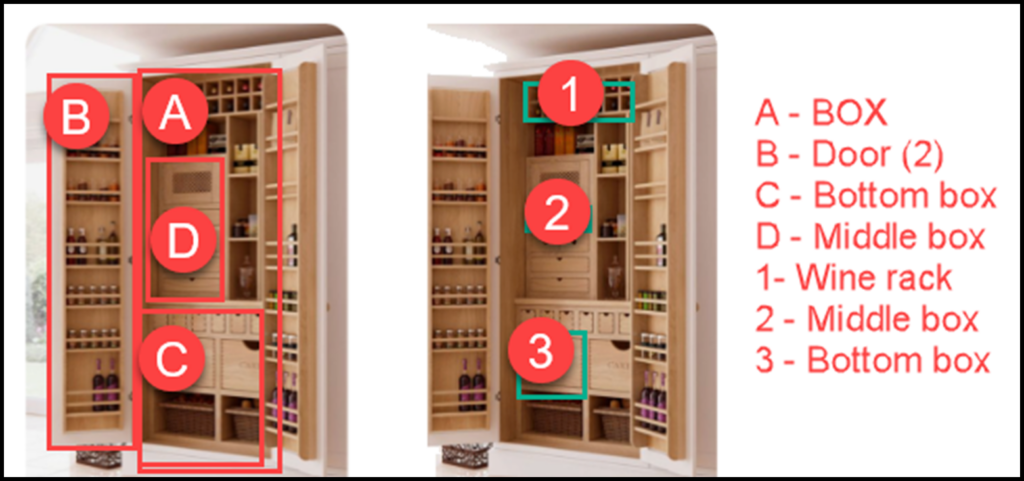
SketchList 3D  creates a wide range of furniture designs, from simple chairs to elaborate cabinets. One example of a design created using SketchList 3D is a modern coffee table. The designer was able to quickly create a 3D model of the table, make any necessary adjustments, and then use the cut list feature to generate a list of all the wood needed.

Another example is a custom-built bookshelf. The designer was able to input the exact measurements of each piece of wood and create a precise 3D model. This ensured that the bookshelf fit together perfectly when it was built.

Comparison of SketchList 3D with other furniture design programs

There are several other furniture design programs on the market, but SketchList 3D stands out for its ease of use and accuracy. Other programs can be complicated to learn and use, which can be frustrating for beginners. SketchList 3D, on the other hand, has a user-friendly interface that makes it easy to create designs quickly and accurately.

SketchList 3D also has a wide range of features that make it a versatile furniture design app for furniture design. Other programs may have similar features, but SketchList 3D’s user-friendly interface sets it apart.

How to get started with SketchList 3D

Getting started with SketchList 3D is easy. Simply download the app and start exploring the features. There are many tutorials available online that can help you learn how to use the app effectively.

It’s also a good idea to take the time to learn keyboard shortcuts. This will save you a lot of time when designing furniture, as you won’t have to keep switching between the mouse and keyboard.

SketchList 3D resources and tutorials

There are many resources and tutorials available online to help you learn how to use SketchList 3D effectively. The SketchList 3D website has a wide range of tutorials, as well as a user forum where you can ask questions and get help from other users.

There are also many YouTube tutorials available that can help you learn how to use SketchList 3D. These tutorials cover everything from the basics of the app to more advanced features.

Conclusion

SketchList 3D is a powerful furniture design app that has revolutionized the way I approach design. Its user-friendly interface, accurate measurements, and wide range of features make it the perfect tool for furniture designers. If you’re looking for a program for furniture design, I highly recommend SketchList 3D. With this app, you can streamline your workflow, save time, and create beautiful designs with ease.


To see more SketchList 3D click here.

To browse other ideas see these.

Categories
Demonstration

Enabling Cutting Dado on Surfaces

SketchList 3D is a powerful cabinet design software that allows users to create realistic 3D models of their woodworking projects. However, some users expressed disappointment that the software did not include the ability to cut dados on board surfaces. We listened to this feedback and added this functionality to SketchList 3D.


Why Dado Cutting Was Not Previously Included

One reason dado cutting was not previously included in SketchList 3D is that we had thought joinery only affects board edges and not surfaces. However, we realized that dado cutting is an important joinery type that affects board surfaces. Additionally, we already had most of what we needed to create dados; we just needed to allow the hole to continue off the edges of the board.


A man wearing blue jeans and a black sweater is using a tool to drill a hole in light brown piece of wood.


How to Cut Dados in SketchList 3D

To cut a dado in SketchList 3D, select the surface of a board and click on “non-round holes.” Locate the dado from the bottom-left (like all else in SketchList 3D), enter the cut’s width, height, and depth, and you’re all set. You can also switch the values to cut the dado in the vertical direction. Make sure to name your dado and provide notes if you like.


 A woman is standing in a woodworking shop using tools to measure and cut wood, while wearing a face mask, and a leather apron.


Using Dados and Woodworking Joinery Tools in Furniture Design

Dado cutting is an essential technique in furniture design and cabinet making. Adding this capability to SketchList 3D allows users to create more detailed and precise designs. With photo-realistic 3D images, you can show clients the care you take with the details of their projects.


Woodworking Joinery Tools — In summary

Adding dado cutting to SketchList 3D expands the software’s capabilities and allows users to create more detailed and precise designs. Whether you’re a professional woodworker or a hobbyist, SketchList 3D is an excellent tool for designing and visualizing your woodworking projects.


BTW – Are dado stack blades required?

Categories
Blog

Don’t Get Lost in the Search for Furniture Design Software

Are you in the market for furniture design software but feel overwhelmed by the sheer number of options available? Choosing the right software can make all the difference in your productivity and business success, but how do you know where to start? 

Although signing up for just about every free trial can be tempting, it can cost you more than you might think. Yes, it might not cost you money, but it can cost you valuable time, which is just as important, right? But don’t worry; we’ve got you covered. In this guide, we’ll take five easy steps to help you choose the best woodworking software.


Step 1: Define Your Requirements

It’s essential to start with the basics. What do you need from your woodworking software? Take some time to write down your requirements, and don’t hold back! Be as specific as possible so you don’t end up with furniture design software that exceeds your expectations. Write it down if you need 3D designs with intricate details or efficient cutting list optimization.


Step 2: Search for Software

Once you’ve got your requirements list, it’s time to hit the web. Search for software that meets your needs, starting with your most critical requirements. Don’t worry about price yet – focus on finding solutions that fit your needs. Remember to bookmark the pages of software that fit the bill.


Step 3: Read User Reviews and Customer Stories

Now that you’ve got a list of potential options, it’s time to research. Check out what other users are saying about the software. User groups, blogs, company reviews, and customer stories are great places to start. Pay attention to any red flags or joint complaints. Keep notes on your requirements document as you go.


Step 4: Contact the Vendor

After narrowing down your list of potential furniture design software options, it’s time to contact the vendors. Please email your notes and requirements and see how they respond. Their response (or lack thereof) can tell you much about the product and the company.


Step 5: Try the Software

Before you commit to a software package, make sure you give it a thorough try. Have a couple of sample projects in mind – one easy and one more complex – and see how the software handles them. Read the manuals and view tutorial videos to ensure you understand the tool’s capabilities. And don’t be afraid to contact the company with any questions or concerns.


Some closing thoughts

Evaluating furniture design apps may seem like a hassle, but it’s an important decision that can save you time and resources in the long run. By following these steps and being organized and careful, you can avoid purchasing the wrong software and find the best-fit tool for your business needs. 

And of course, you can also find out more about SketchList 3D’s free trial here.

Categories
FAQ Uncategorized

Case good design – common error forgetting doors

Case Good Design – make sure to leave room on the front for frames and doors.

Next question from a user that might apply to more than this one person who was doing a case good design….

“If I want to add the doors at the end and forgot to leave front space for them I wasn’t able to move the whole assembly with exact 18 mm to the back to leave space for the doors without messing up the whole project – I had to start fresh again with the doors first.

I select assembly, input front 18, click on back for automatic calculation asks me for automatic resize and after it gives me error and dimensions come back to original. Moving with mouse is not exact and I get values with comas and is not that useful.”

I hate when I do this!  And I still do – after nearly ten years.  This very situation caused us to develop the batch move function.  In Adrian’s case he needed to push everything in an assembly back by 18mm.

Normally this means every value of ‘front’ in you case design needs to change from 0 to 18 and MOST of the corresponding ‘back’ values changed to move the board backward.  An exception happens when you need to shorten a board – like a side.  Then the front goes from 0 to 18 and the ‘width’ changes.

A few other precautions.

The project depth must be large enough to hold the new size of the cabinet.

The assembly depth must be changed to fit the newly located and sized boards.

BUT WAIT.  You are much better off using the Batch Move method.

  1.  Make the project depth big enough to hold the new depth of the assembly.  If may already be big enough but be sure to check.
  2. At project level – select the assembly you want to change and click the Batch Move button.
  3. Click – in this case – Front-Back
  4. Enter the move amount
  5. Chose Back or Front – pick accordingly.
  6. Exit

All set.

case design select assembly for batch move


case design room for door


Categories
Blog Uncategorized

Cabinet Design Software – clone function

Cabinet Design Software – using the clone functions to save time

 SketchList 3D cabinet design software  allows you to make exact copies of any object in your project by using the clone function. The clone function saves time by allowing you not to redesign the same part over and over again. (Somewhat related to this idea is the SketchList standard library where you can create an object design and save it for use in other places.) Imagine making a detailed cabinet with many shells, doors, and drawers and having to re-create that board by board each time. It’s much more efficient to simply select that assembly and clone it.

There are three types of clone within SketchList 3D.


  1. Clone – this makes an exact copy of the object highlighted.
  2. Clone and space – this makes any number of copies of the object. In addition it allows you to space the copies from bottom to top, left to right, or front to back.
  3. Clone and mirror – this allows you to make a copy of an object in mirror it 180° left or right.

There are different ways of initiating the clone command.

clone form

  • There is a clone button on the object form to the right of the SketchList 3D main screen
  • Right clicking the object opens a menu from which you can select the clone sub-menu. On that sub-menu you can pick any of the three clone techniques.
  • Right clicking a row in the spreadsheet will open a menu from which you can select the type of clone you desire.


clone sh

Cloning makes an exact copy of the original object. In the general spreadsheet you’ll notice the row is highlighted with the gold background. This means that an object has been cloned but not yet changed. This highlighting helps you see that there are indeed two objects in exactly the same space. When you change the name of the cloned object the gold highlighting will go away.

Usually the next step is to relocate the cloned object.

Clone and mirror makes a copy of the original object but inverts it left to right. If you had a bookshelf on the left of an assembly and drawers on the right cloning and mirroring would result in the second assembly where the drawers would be on the left and the bookshelf would be on the right.

Clone and space makes one or more copies of the original object. Objects may be clone and space in any of three directions – bottom to top, left to right, front to back.

form for clone and space

There are two different ways to do the spacing.

Fixed space between the cloned objects.  The space between, for example, the tops of shelves         and the bottom of the next shelf are equal for all pairs of shelves in the group. This way you can determine that the spacing between two objects would be a fixed amount, for example 10 units.

 Variable space between cloned objects. The space between the objects is calculated over a span you specify. The beginning of the span is the original location of the selected object. You enter the end of the span.   The ending of the span is set to the inside edge of the last object.   For example if a bookcase height is 100 units and the thickness of the shelf is one unit the ending span would be set to 99. The form provides a calculation to show the top, right, back edge of the last copy of the object.

In fact with the variable spacing option you can clone and space the boards in more than one direction. In the example below the boards were cloned and then spaced in all three directions. This provides a bit of a staircase functionality in SketchList 3D.

multi direction clone

Clone and space capability also exists within the round a non-round hole functions of SketchList 3D.  In that case you can select a hole and clone and space it.  [More later]

Watch the video.

Categories
Blog Uncategorized

Cabinet Design – grain, orientation, and materials

Cabinet Design Software – using board definition  tab to change grain, orientation and materials.

Creating a new board in SketchList 3D cabinet design software establishes a definition of that board that contains information about the orientation (what it looks like from the front of the assembly), grain direction, material type (for example sheet or dimension lumber), and material (species or appearance).

There are times when you may want to change some aspect of that definition.

To do that click on the board definition tab on the right side of the SketchList 3D cabinet design software main form.

 board defintion tab

 That opens the board definition form.  The current values for that board are already set in the form. If you want to change any just click an alternative value.

You may change any or all of four elements of the definition.

  1. Orientation – the way the board looks from the front of the assembly. This is really setting the board thickness so one SketchList 3D runs the Optimizer it knows how to lay this board onto the source material.
  2. Grain direction – the direction of the grain. The option any essentially means you don’t care.
  3. Material type – usually sheet goods or solid lumber, but there are other types of material such as glass, leather, or metal to name a few. There are also objects as a material type. In this category you may have stored an image of a refrigerator for example.
  4. Material – this is the name and the visual appearance (grain image) of the material you’re choosing for this board.


board definition form


When you’re finished adjusting that board definition move your cursor off of the new board form and it will close.

Watch the video.

Cabinet Design Software – using board definition tab to change grain, orientation and materials.

Creating a new board in SketchList 3D cabinet design software establishes a definition of that board that contains information about the orientation (what it looks like from the front of the assembly), grain direction, material type (for example sheet or dimension lumber), and material (species or appearance).

There are times when you may want to change some aspect of that definition.

To do that click on the board definition tab on the right side of the SketchList 3D main form.

board definition tab

That opens the board definition form. The current values for that board are already set in the form. If you want to change any just click an alternative value.

You may change any or all of four elements of the definition.

Orientation – the way the board looks from the front of the assembly. This is really setting the board thickness so one SketchList 3D runs the Optimizer it knows how to lay this board onto the source material.
Grain direction – the direction of the grain. The option any essentially means you don’t care.
Material type – usually sheet goods or solid lumber, but there are other types of material such as glass, leather, or metal to name a few. There are also objects as a material type. In this category you may have stored an image of a refrigerator for example.
Material – this is the name and the visual appearance (grain image) of the material you’re choosing for this board.

board definition form

When you’re finished adjusting that board definition move your cursor off of the new board form and it will close.

Watch the video.

Categories
Blog Uncategorized

Built in Storage – Design and Built to Fit

Built in storage saves space and hides junk…

Built in storage, bookcase, and entertainment centers are really in demand.  Either for your personal use, or by the request of a prospect – these units are hot.  They are perfect for SketchList 3D because they tend to be large and complex, offer opportunities to use objects from the library, and tend to be a design and copy type of project.  A while back a survey showed us that nearly 60% of SketchList  3D users had designed at least one built in storage unit with the software.

This is a great example of the type of built in storage I’m talking about.   It rescues a lot of room area from a more or less otherwise hard to use corner of this bedroom.  And yet it fits in perfectly.  Why?

The ability to design on the computer provided the ability to try and try again with different approaches.  The ability to show such great details [angled corners, molding on top. drawer fronts] at the design stage gives you a sense of what you will accomplish.

Beyond the design stage go the reports and drawings necessary to pull the finished work off.

Well heck – let me share the email from this SketchList 3D user with you.

“Just wanted to send you some of the pictures of the built-in that I designed using SketchList 3D.  This was probably the largest most complex project I ever attempted and knew that I needed some drafting help.  I purchased SketchList 3D and began designing.  I don’t think there would have been any way for make all the design changes and construction details without SketchList 3D.  What was really great was the program which optimized and laid out the cutting diagrams for all of the sheets of plywood.  Rather than having to cut the 4 x 8 sheets of plywood in my small shop, I just gave them to my supplier who cut everything to size.  So for a small fee, I was able to save hours of wrangling large sheets of plywood into about 100 different pieces.  Thanks again for a wonderful product.”

What a great concept – asking the lumber yard to cut the sheets.  I am getting too old to ‘wrangle’ 4 x 8 sheets around anymore.

Thanks for the nice feedback Mike!  Question – will the dog let you pass?

If you have a design to share – send in a photo[s] and let me know what you’ve accomplished.

Categories
Blog Uncategorized

Drag and drop in furniture design software.

People e-mail in asking, or more specifically, demanding that SketchList 3-D should have drag and drop abilities in the design mode.  With the exception of the shaped board editor SketchList 3-D does not allow dragging and dropping of assemblies or components.  This is a specific design decision that I made for several reasons.

First of all, I almost always find drag and drop to be cumbersome.  I drag something, and either my screen resolution, my mouse, or my questionable eyesight keeps me from dropping it at the right spot.  There are graphics programs which allow you to set up a grid of points where you can do a “snap-to”.  The thing about using snap-to is that when you want to snap somewhere between two snap-to points — well, you can’t.  So then you either turn snap-to off or re-size snap-to grid.  And on and on and on.   But that’s just my point of view, based on my experience.

More importantly, I think it’s challenging to the point of impossibility to be working on a kitchen project that is 18 feet wide and hope that you can drag and drop something to the nearest 3/16 of an inch.  Never happen, not quickly at least!

If I want to have a cabinet 4 feet 6 3/8 of an inch from the left, the most direct way to do that is simply typing in 4 feet, 6 3/8 of an inch as the left locating dimension!  Every single time, the cabinet goes precisely where I wanted.  The software developers in the graphics design area called this parametric or parameter driven design.

The use of the drag-and-drop technique that people are asking for seems to be to make two objects butt together.  More than one user would like, in addition to drag and drop, the ability for a board to know when it’s butted against another board.  On one level, this has the same problem as the snap to grid approach.  What happens if, for whatever reason, I don’t want to board the butt but overlap.  I know this might not make sense.  But what happens if? Besides, it’s a pretty challenging technical feat for every board to know where every other board is.

In the parameter driven approach if I know a right edge of the board is at 18 7/8″, to butt a board against it I would enter the left value of the second board as 18 7/8″.  The boards meet no question about it.  And as far as speed goes, while never actually testing it, I’d bet a dollar to a doughnut, drag-and-drop is slower.

Well then why do we allow drag-and-drop in the shaped boards editor?  It’s really hard to say.  Maybe to some degree it’s a marketing concession to the drag-and-droppers of the world:)

To an extent, it makes sense in a limited and controlled geometry of a single board when you want to see exactly where the points are going to be.  But points can always still be entered by typing in their  distances from the bottom-left corner of the board.

All of this comes to the larger question of peoples’ perceptions of what design program should be and do.  New users come to SketchList 3-D from some other sort of drawing program — like a paint program on Windows.  From that point of view it sensible to think in terms of depositing rectangles on a flat plane and dragging the rectangles to create size and space, and then grabbing those rectangles in their entirety and dragging them to other places on the to be workspace. That is easy to understand and many, many people use that type of program.

But SketchList 3-D is more than a simple drawing program.  It is a 3-D furniture design software that incorporates the functions and reports needed to help woodworkers in the shop. It’s able to do this because in SketchList 3D the virtual board you create on the screen is much more than a 2D or even a 3D image.  That virtual board is a visual representation of a record in the database that contains information such as grain appearance, grain direction, source material, cost of the material, type of joinery, type of edging…

The point is there’s a lot going on with virtual boards that you don’t get with a drawing program.  It’s hard to compare apples and oranges.  And after all, I don’t like drag-and-drop not because I don’t like it but because I don’t think it’s as effective as it needs to be.

boards as design element

Categories
Blog

Using Furniture Design Software Reports in the Shop

A recent survey shows that woodworkers said the two most valuable uses of furniture design software are creating 3D images and printing shop drawings.  Sure.

The 3D images help close the deal and the optimized layout diagramdrawings help build it – I get it.

But this is a case, in part, where people put forward a current view of needs or wants and do not move ahead to state their problems in a more encompassing way. And I get that as well — a problem needs fixing.  But it’s like stating the problem as cutting a sheet of plywood and finding that a circular saw and straight edge are the solution.  But then again you might think a bit more and find a table saw to be better, or a panel saw, or even a CNC machine.

Take the shop drawings from cabinet design software programs. Sure you need drawings.  But it would be very nice to also have diagrams to show you how to lay out your parts on the materials to reduce waste.  Or reports that allow you to sort by material then into sizes — for example ‘list all parts of 3/4 cherry plywood that are 8 inches wide’.  Why? Maybe you can rip them all with the same set up.  That saves time.

Or create a list of all boards with a tenon on them — again set it up once, cut it in one process, and maybe save a little more time.  And the report should show both the design length and the cut length (taking account of the tenon(s)) to keep you from making the ‘Oh no, it’s too short’ mistake some woodworkers have tell about.  So think ahead when considering furniture or cabinet design software. Pick the one that solves more than one problem.