There are times in a design when you want to move all or many objects the same distance at the same time. The example that happens most is when designing a user places all front elements of a cabinet with a front value of 0. The the user realizes that there is to be a face frame at front = 0 and all other boards must be moved to the back by the depth of the face frame material. Another example is if the side of a case is at left = 0, forgetting a molding is necessary on that side. You need to move all objects to the right by the size of the molding.
The batch move capability in SketchList 3D is designed to automate that tedious process. With batch move you specify the direction in which you want to move objects, you locate the plane or the place from which you want to make the move, and SketchList 3D does the rest.
The basic rule is any object completely to the left of the stretch plane remains untouched.
Unlike stretch or shrink assembly, the batch move move plane is a flat, 2 dimensional plane.
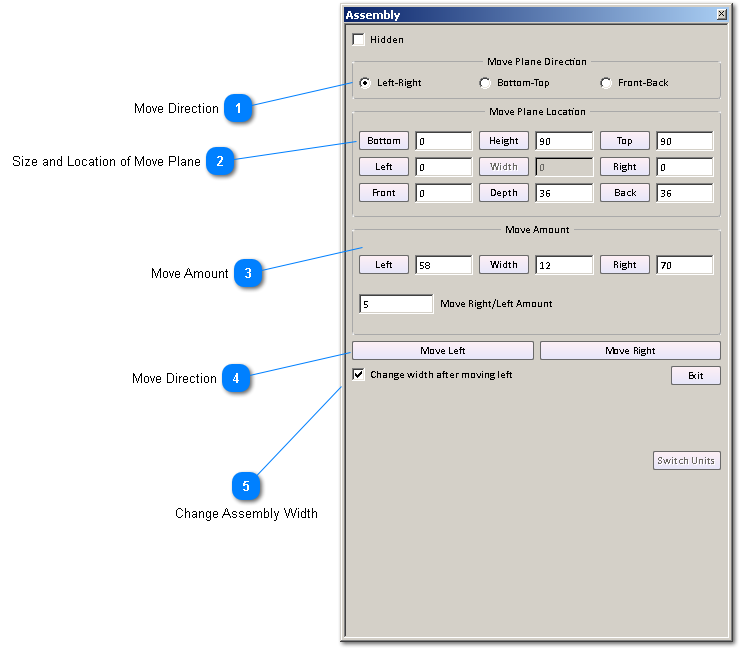
 Move Direction
You can select the move direction from three options:
1. Left – right
2. Bottom – top
3. Front – back
|
|
 Size and Location of Move Plane
The move plane sets what objects will be moved. the move plane when moving objects to the left and the right may be moved to the left and right by changing the values of left and right in the move amount area of this form. unlike the stretch plane which you can become a three dimensional object the move plane is always a two dimensional object.
-
If moving left to right the width is always zero.
-
If moving bottom to top the height is always zero.
-
If moving front to back the depth is always zero.
The same rules, adjusted for direction, apply to the bottom top movement and front back movement.
if you click the change with after moving check box the size of the assembly will be changed to reflect the new location of the boards. If you're moving an object to the right, for example 40 inches, and the assembly is only 30 inches wide the assembly will become 40 inches wide.
Assembly size adjustments cannot be less than zero on the left, zero on the bottom, zero on the front.
|
|
 Move Amount
There are two ways to set the amount of the move.
Changing the values (in the case of left right move) of left, with, or right – specifically one or two of the three – will cause SketchList 3D will calculate the move amount.
Changing the value in the move right/left amount text box sets the distance of the move directly.
|
|
 Move Direction
When you select the direction of the move with the radio buttons at the top of the form the labels on the to move buttons in this section reflect your choices for move direction.
You can choose to move left or move right, move up or move down, move front or move back.
|
|
 Change Assembly Width
Check this box if you want this SketchList 3D automatically adjust the size of the assembly to accommodate the move. The alternative to this is to go to the project level and manually change the assembly size that the contents of the assembly will fit after the movement.
|
|