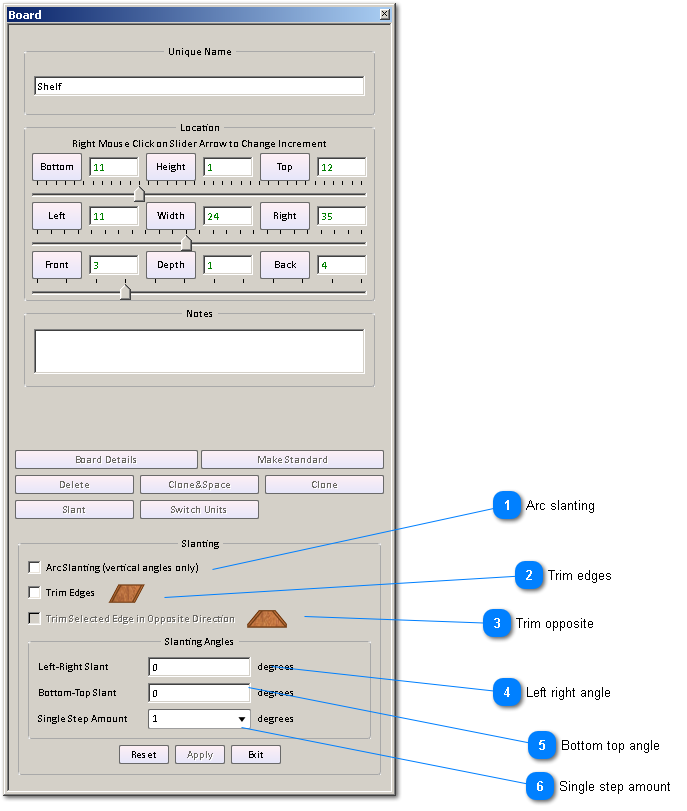
Board Form With Slant Selected
Slanting changes the angle of the board relative to either the horizontal (front - back) or vertical (bottom - top) direction.
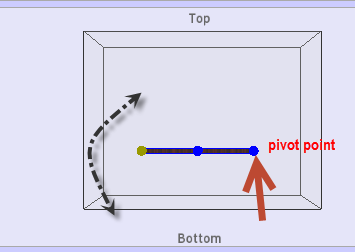
When you select a board and click the slant button, the selected board will display round dots. These dots indicate the side of the board which will be moved. In the following
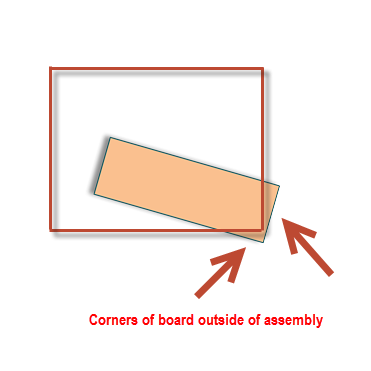
It is important to note that the pivot point is a point around which the board swings. This means the corners, if the board is too close the the assembly edge, can make the board go outside of the assembly boundary, which is not allows in SketchList 3D.
You can move the board to avoid this error.
The normal way to swing is to move the end of the board opposite the pivot without affecting the board size or shape. If this is the desired effect, leave the check box "Arc Slanting" unchecked.
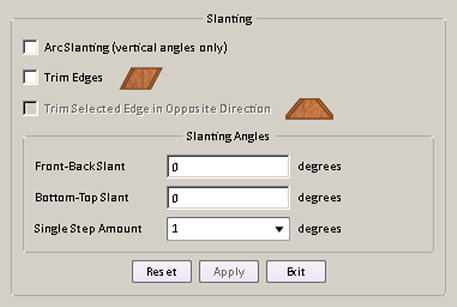
You can choose to have SketchList 3D trim the ends of the board to maintain a parallelogram shape if you wish. Or you can choose to have the ends trimmed in opposite directions.
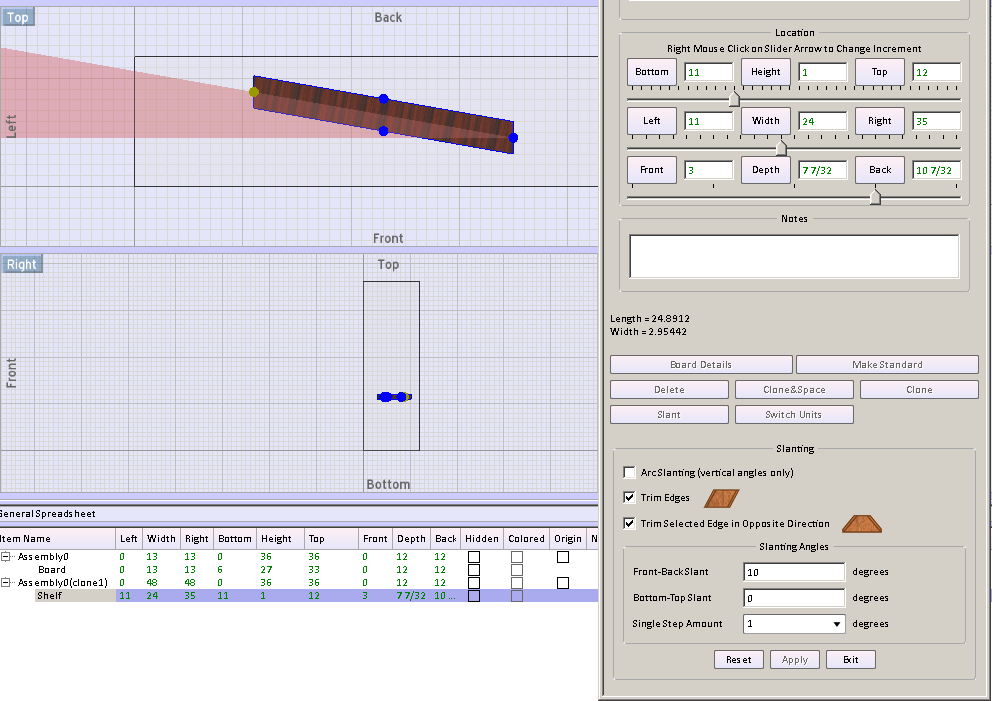
You can slant in two directions: front - back (horizontal) or bottom - top (vertical).
This example shows a front back slant of 10 degrees.
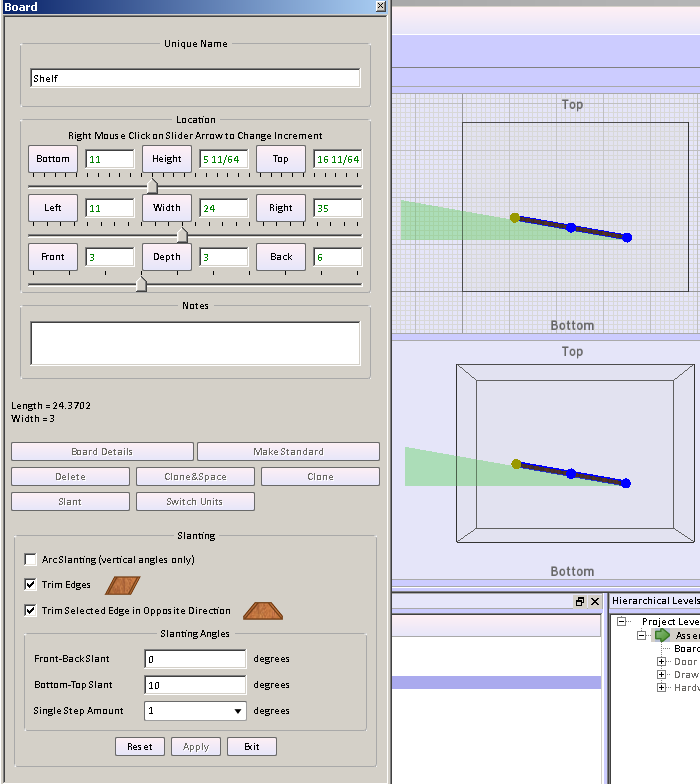
This example shows the same board slanted bottom to top by 15 degrees.
using that same board and applying the Arc Slant you see the board has become slightly shorter to the left side and width.
 Arc slanting
There are two ways to slant the board. One is to specify the angle for a board of a given length and SketchList 3D will slant that board and maintain that angle and length.
the other way to select the board is to check the arc slanting board. This option takes the plane or end point of the board and maintains it during the slant. Generally this has the effect of lengthening of the board . Use this option when you put a board left right, for example, where you want the board and on both the left and the right side. But you want this board to be oriented at a 45° angle from its last while maintaining that same value on the right side. Arc slanting will accomplish this.
|
|
 Trim edges
This tells SketchList 3D that you want the boards to be other than rectangles or squares. SketchList 3D will calculate and render the edges of the board accordingly.
|
|
 Trim opposite
At times when you want the angles of the ends of the board not to form parallel with the other and you can select this option.
|
|
 Left right angle
You can either type in the number of degrees you want the angle to form or you can use the wheel on your mouse to dynamically change the angle. Angles enter can be positive or negative values. The image area of the slanted board will show you what the angles board results will be before you click apply.
|
|
 Bottom top angle
You can either type in the number of degrees you want the angle to form or you can use the wheel on your mouse to dynamically change the angle. Angles enter can be positive or negative values. The image area of the slanted board will show you what the angles board results will be before you click apply.
|
|
 Single step amount
This is the value that each click of your mouse wheel has when you dynamically scroll up and down or back and forth to set slant angles.
|
|