Spreadsheet is used to select an object in the design. It is also used to change the location or size of an object. Uses the spreadsheet rather than forms when information about other objects in the same design – like the left value or right value of of another board – will help you determine the proper sizing or location for the object with which you are working.
For example if I want to butt two boards left to right I need to know the left value of the first board so I might change the right value of the second board accomplish the but. This is where the spreadsheet will show you that information in a useful manner.
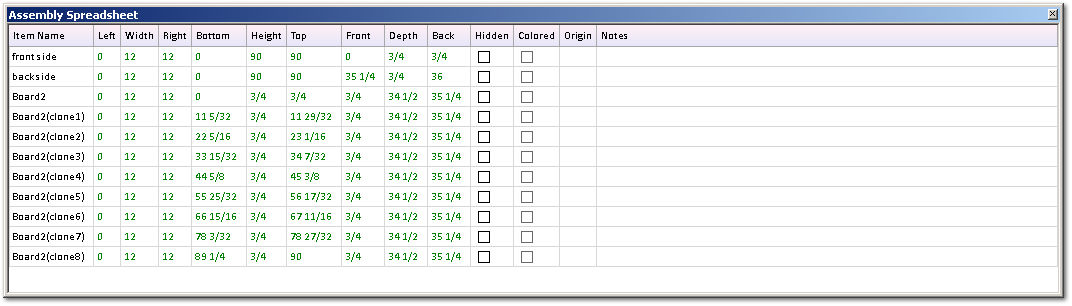
The spreadsheet columns consist of three groups of three which locate and size objects. The other columns are information purposes – for example if the object has been colored in the design.
The three groups of three have to do with the with height and depth of the object.
Left plus with equals right.
Bottom plus height equals top.
Front plus depth equals back.
Moving the cursor into the cell than changing the value for example the left will cause the cell fonts in the with and right cells for that row to turn red. This means that those two values are candidates to be changed. If you click for example the column heading right you will see that the value in the cell of the row you are working and right change values.
Say left equals one, width equals 10, right equals 11.
If I change left to five and click on the column heading right its value will change to 16.
The same process is available to the bottom height and top, and front the depth and back triplets.
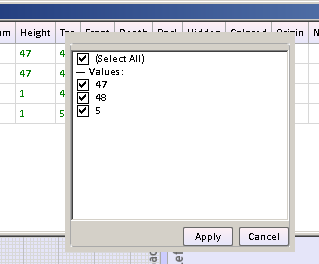
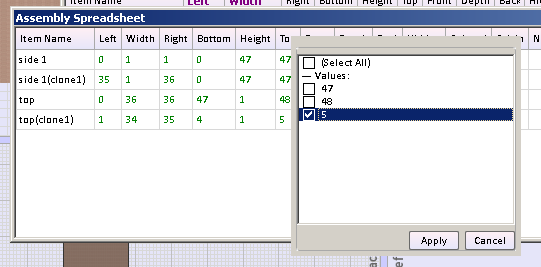
The spreadsheet will filter rows by value.
Right click the column heading and see this.
Click select all then click 5.
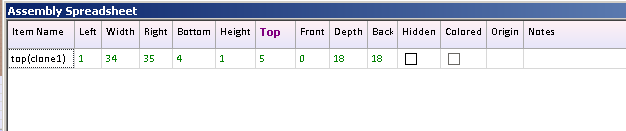
You will only see rows where the top value = 5.
Notice the word Top is bold indicating that column is filtered by value.
This Spreadsheet displays all of the objects contained in a specific Container. If you left click a row you selected that object if you write click row you open the following menu.
-
Clone – makes exact copy of that object
-
Rotate assembly – rotates an object.. You select to rotate left 90, right 90, or 180°.
-
Clone and mirror – makes a clone of an assembly changing the elements right to left.
-
Merge this assembly with another – lines to assemblies together.
-
Hide row
-
Delete
-
Insert on this level – will insert another assembly
-
Insert into selected assembly – will insert object into this assembly
-
Highlight row – allows highlighting of row with color and sorting rows within the spreadsheet I that color.
-
Export – send the contents of the spreadsheet to a form from which they may be imported to other file formats.
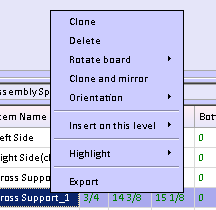
On the assembly level, rather the project level, the objects of the assembly are shown in the spreadsheet. At that level right clicking on a row displays slightly different.
-
Clone – make an exact copy of the board
-
Delete - deletes board.
-
Rotate board – rotate board 90 left, 90 right, 180°.
-
Clone and mirror – clone and mirror's board.
-
Orientation – allows you to change orientation from spreadsheet level.
-
Insert on this level – insert new object into this assembly.
-
Highlight – highlights row for sorting.
-
Export – blues contents of spreadsheet to a form from which contents can be exported to various file formats.