Set-up Orientation, Material and Dimensions of Board window
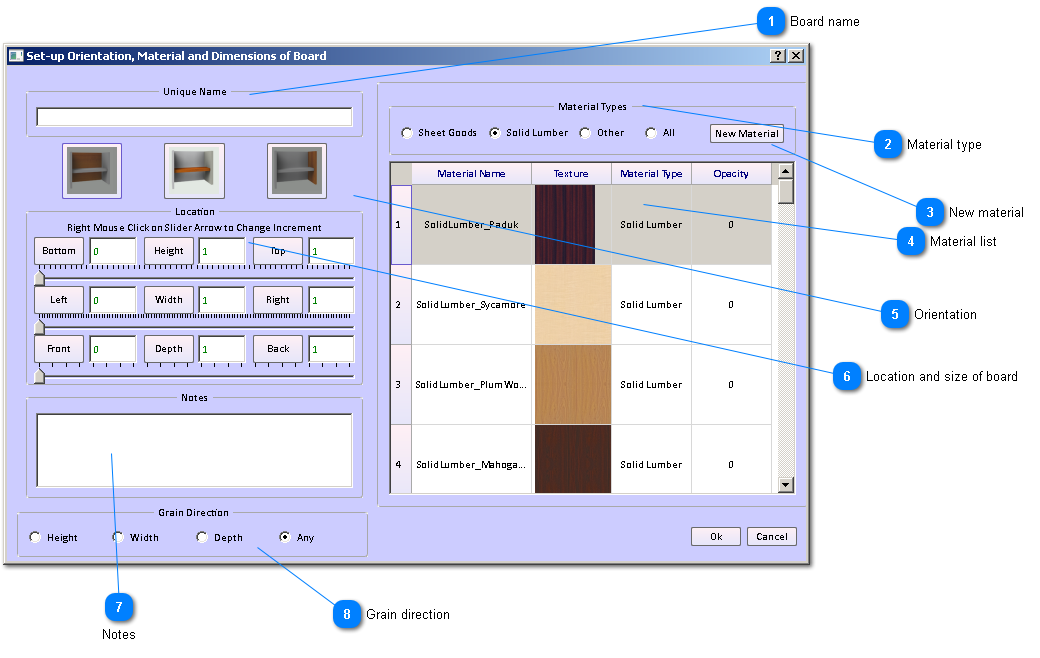
 Board name
Enter the name of the board. The more descriptive the name the more helpful that will be as you progress in your design and take your work to your shop. If you're having a series of boards that are the same for example a set of shelves it is better for report sort purposes to name them shelf bottom shelf middle shelf top rather than bottom shelf middle shelf top shelf. Beginning them with the word shelf will group them in any report sorted by name.
It might be useful, if you know, to enter the material size in the name. For example you might name the board 2 left stile, in fact name all boards you wish to cut form the same size material with a 2 as the first character in the name. This was the optimizer will group them all in one grouping if the texture and board thickness is the same.
|
|
 Material type
s are for the purpose of filtering the materials you are selecting for this particular board you can check the radio button to narrow down the types of materials that are displayed.
The types are:
-
Sheet goods
-
solid lumber
-
Other
-
All
|
|
 New material
You can gain direct access to the new material form found under the set up main menu item
|
|
 Material list
These are the materials available for this board. Characteristics or attributes of the material include name, a texture for woodgrain or color, material type, and opacity or amount of transparency. You use this last if you were creating a sheet of glass for example.
|
|
 Orientation
SketchList 3D uses the concept of orientation to manage boards in the database and to better understand how to apply the boards to the material for an optimal cut layout diagram. The orientation to select is determined by what will that board look like when viewed from the front of the assembly. The first is a flat orientation – like a backing board. The second is a horizontal orientation – like a shelf. The third is a vertical orientation – like a side board.
|
|
 Location and size of board
The text boxes and sliders in this area of the form set both the size and location of the board.
|
|
 Notes
Notes entered here will appear in both the spreadsheet column "notes" and can be placed in various reports involving this board.
|
|
 Grain direction
this sets the grain to run in the direction of the board as you desire. This will give you rendered image showing grain directions. Another purpose for setting the grain direction is to properly layout the board on its source material when running through the material layout Optimizer. If the grain has no direction - like a solid color material - or the grain direction doesn't matter - for example on the inside of the case - you can select any for the grain direction. By informing the Optimizer that the grain direction has no value it may be that you achieve a higher degree of optimization in the layout and therefore safe materials.
|
|