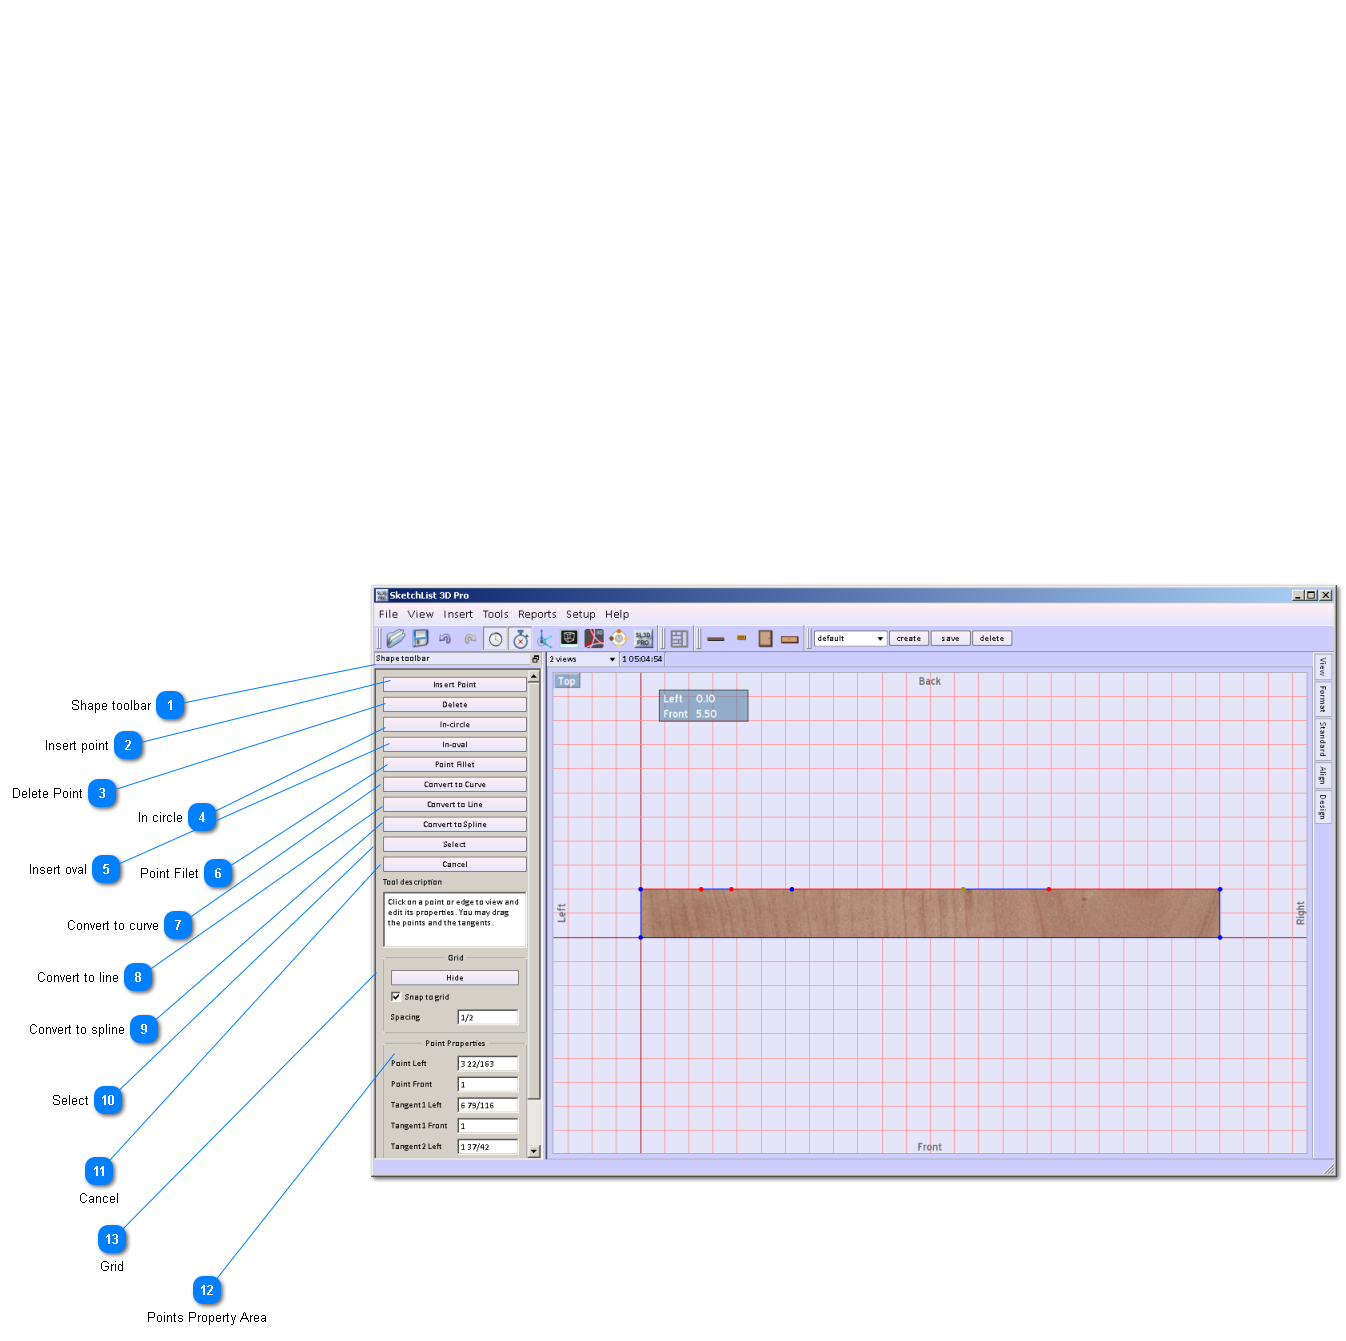
You can create complex shapes in boards or board like materials using the shape board function. The shape board function allows you to add and delete points on the edges of boards to create a shaped surface. You can only shape the surface of a board. You can think of the surface of the board as being that which displays the the grain direction. The board shows in the shape board function originally as either a rectangle or square. In both cases you start with four points. You can delete one of those points, turning that rectangle or square into a triangle.
With the original square or rectangle you can choose the in circle or in oval tools to make the shape into the shape of your choice. You can take a circle or an oval insert and delete points to create shapes such as a semi circle.
To create even more complex shapes you can enter, delete a series of points, and even change a straight line into a curve or a spline.
The points are located from the point of origin of the board's surface. In relation to your computer screen the point furthest to the left and closest to the bottom is that 0-0 point. the text labels to the right left top and bottom of your screen help you orient that board within its assembly. For example in the screen image above the left and right are labels so and the edge to the bottom of the screen is actually the front of the board and the edge to the top of the screen is actually the back of the board.
You change the values of the points in the points property area of the form.
 Shape toolbar
Series of tools to help you create shapes I adding, deleting, or moving points.
|
|
 Insert point
 on an edge of the board.
|
|
 Delete Point
Uses select tool to highlight the point you want to delete then click the delete button.
|
|
 In circle
This tool creates a circle from your board.
|
|
 Insert oval
This tool creates an oval from your board.
|
|
 Point Filet
This tool round over a sharp corner.
|
|
 Convert to curve
Select a segment of the line and click this button. A series of lines and small dots will appear on that line segment. Move the dots to create the curve you desire. Remember you cannot go outside the boundaries of the board.
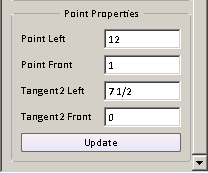
When you are in this curve mode of working and select a point the point property area of the toolbar will change as follows:
This allows you to enter specific values for the points in your curve. After you change the values and click the update button.
|
|
 Convert to line
This tool will change a curved segment to a line.
|
|
 Convert to spline
Select a segment of the line and click this button. A series of lines and small dots will appear on that line segment. Move the dots to create the Spline you desire. Remember you cannot go outside the boundaries of the board.
When you are in the spline mode of working and select a point the point property area of the toolbar will change as follows:
This allows you to edit specific points defining the spline. After you enter the points click the update button.
|
|
 Select
Click this tool and then move your mouse cursor to the point you want to select and left click it.
|
|
 Cancel
 the action and returns your board to its original shape. This is the equivalent of a complete reset. CAUTION.
|
|
 Points Property Area
Changing the left and front values of the points by entering them and clicking the update button.
|
|
 Grid
To help you place points precisely you can use the snap to grid by checking the checkbox the left of the snap to grid label. You can enter the size of grid you want to use. You can start shaping the board with one grid size and move to another to provide you more versatility.
|
|