Assembly Shrink / Stretch
Shrinking and stretching an assembly are two ways to resize an assembly. This differs from simply changing an assembly size for example making it 102 units wide when it had been 100 units wide. in that case you would simply go to the project level to units to and change the width of that assembly by adding two. But that would just make the assembly two units larger to the right. Nothing within the assembly would be changed.
OF course the project size must be large enough to hold the new assembly, if that assembly is made bigger by a stretch.
there are times when you literally want to take objects, such as boards, from within the assembly and change their sizes. One way to do that would be to go in change the assembly size, then change the size and or location of every board in the assembly individually.
The stretch and shrink capability in sketch list 3-D is designed to automate that tedious process. With stretch and shrink you specify the direction in which you want to stretch or shrink, you locate the plane or the place from which you want to make the changes, and sketch list does the rest.
This is probably the most comprehensive and complex process within sketch list 3-D. On one level it's pretty simple. You simply say I want to stretch this assembly left to right, enter the amount you want to stretch, locate the stretch plane, and click okay.
But it can be more complex. For example you may want to stretch from a certain point all objects except for a drawer. There is a weight within the stretch and shrink function of SketchList 3D to make the stretch plane into a three dimensional box that gives you absolute control over what objects are stretched or shrunk.
The basic rules are:
1. Anything completely to the left of the stretch plane remains untouched.
2. Anything completely to the right of the stretch plane is moved to the right by the stretch amount.
3. Anything intersected by the stretch plane is stretched by the stretch amount.
4. Anything with in V3 dimensional stretch volume, as opposed to the plane, is ignored.
Again this is one of those things that's probably better understood by watching the video.
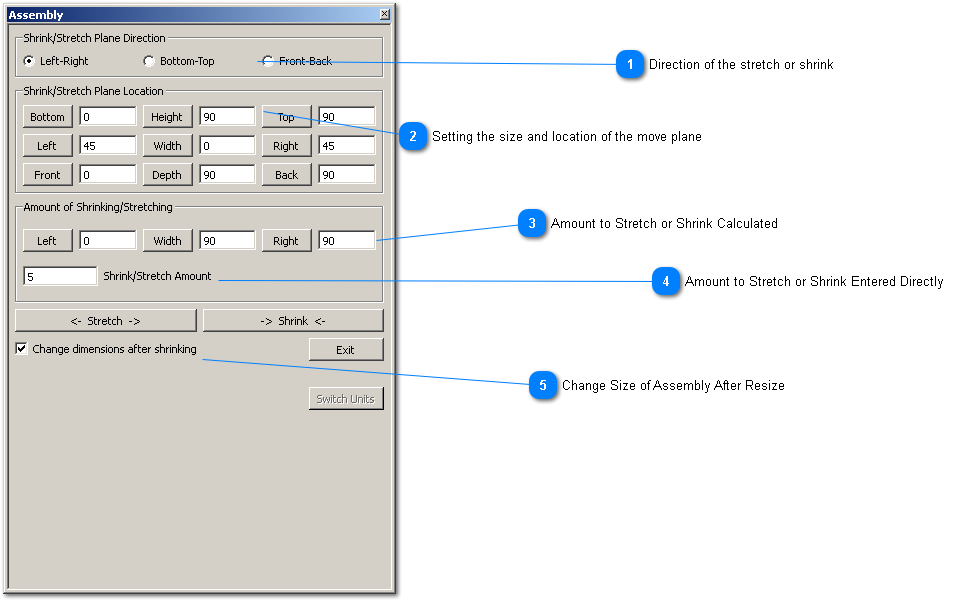
 Direction of the stretch or shrink
You can select the shrink from three options:
1. Left – right
2. Bottom – top
3. Front – back
Remember all movement in sketch list 3-D comes from the point of origin. So stretching an assembly by 10 units to the right increases the size and relocates the objects within the assembly by moving them, if necessary, to the right. There is no concept of stretching toward the left because the left value of zero is the smallest you can have in SketchList 3D. (If you need to "add size" toward the left of an assembly, you would use the batch move function to move all of the objects in the assembly for the right by the amount you needed to add. Batch move is covered in another place in this document.) |
|
 Setting the size and location of the move plane
The default location of the move plane is in the middle of the assembly. The default the size of the move plane depends on the direction.
-
if moving left to right the default size of the move plane is the height and depth of the assembly. It's with is zero.
-
If moving bottom to top the default size of the move plane is the depth and width of the assembly. it's height is zero.
-
If moving from front to back the default size of the move plane is the height and the with of the assembly. It's depth is zero
You change the location and the size of the move plane the same way you would change the location or size of any object within sketch list 3-D.
|
|
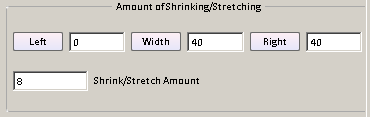
 Amount to Stretch or Shrink Calculated
Determine an amount to shrink or stretch by using the Left - Width - Right triplet (in this case since we are changing from left to right).
For example if you are shrinking and know the right edge of the assembly must end at 40 - replace the 48 with 40 and click the button "width".
See that SketchList 3D changes both the width of the assembly and the shrink/stretch amount.
|
|
 Amount to Stretch or Shrink Entered Directly
You can enter the amount to shrink or stretch by typing in the amount.
|
|
 Change Size of Assembly After Resize
If the affect of shrinking or stretching as assembly would change its size, you can have that change done automatically. If for example you we stretching something within an assembly - say a base cabinet - and the new size still fits inside the current size of the assembly - nothing is required. HOWEVER if your change would go outside the limits of the assembly - and you do not check the change the assembly size option - you would need to back out to the project level and change the assembly size manually. If you check the change assembly size option SketchList 3D will do this automatically.
|
|